
Basic Growth Guide
Growing Your Fleet: Adventure, Trade, Combat
Updated date : 2023-12-13 19:08(UTC +9)
Growth
Adventure, Trade, and Combat are the three major contents of Uncharted Waters Origin.
A player will improve in each area depending on which content they focus on.
■ How to increase EXP for each area
Adventure
Adventure means sailing out into the open world to discover, confirm, and collect architectures, resources, fauna, flora, artifacts, and treasures.
When you set your Focus to Adventure, you will gain Daily Tasks such as docking in and departing from cities, Land Exploration, and gaining Adventure Fame. You can obtain Masts for building ships as a reward for completing Daily Tasks.
While sailing, you will come upon things to discover and collect. These are called Discoveries. You can add entries in the Encyclopedia as you make your Discoveries and collect them.
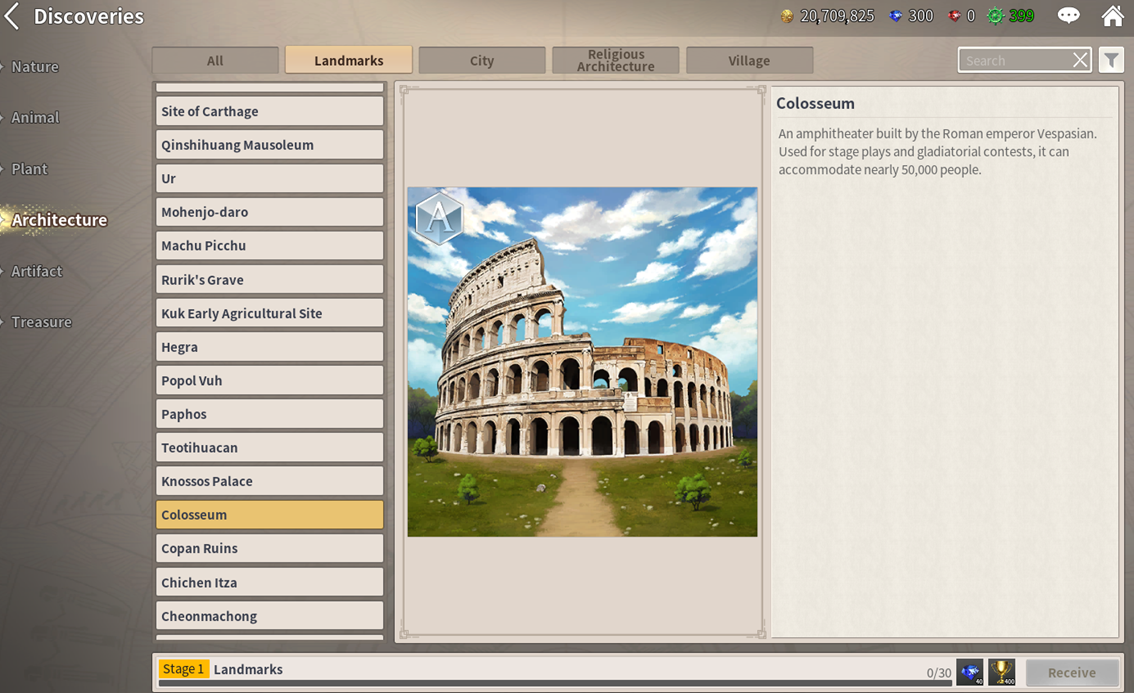
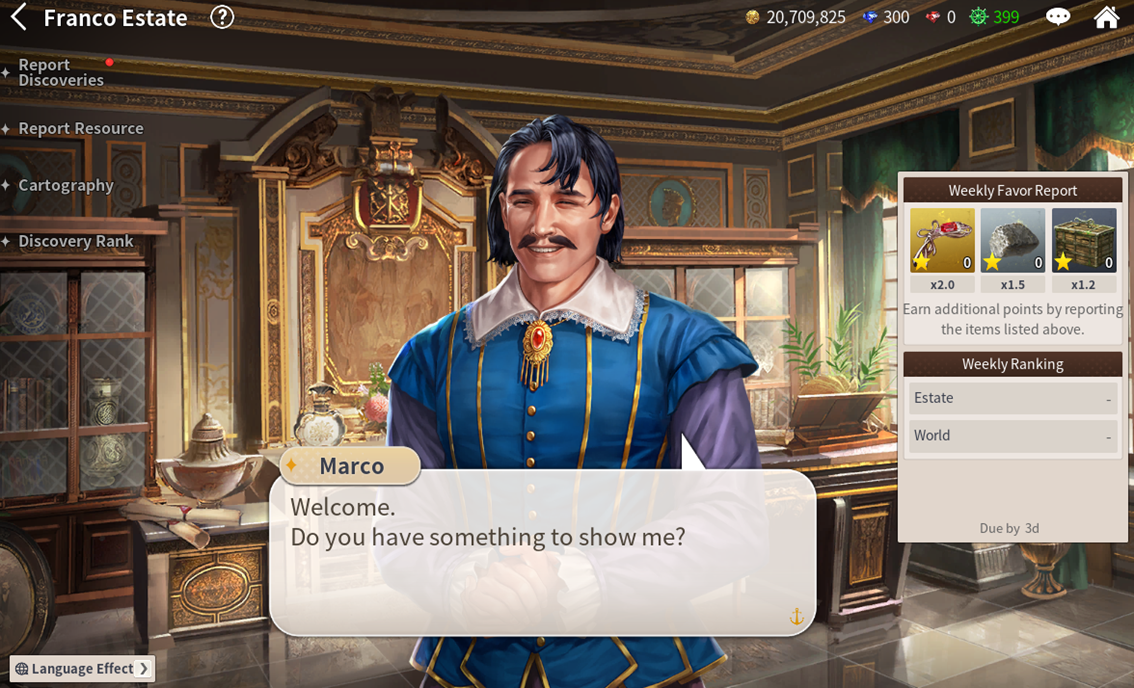
Also, note there are Collectors in the world that collect various Discoveries. Visit their Estates and make contracts with them. You will then report your Discoveries exclusively to that Collector and receive a variety of rewards, including Adventure Fame.
Each Estate and World has its independent Discovery Ranking. If your Rank is high enough, you can gain additional rewards, such as Blue Gems and Adventure Fame.
Adventure EXP is considered to be the easiest to gain. Each time you dock in a City, Adventure EXP is gained based on the distance you have sailed. This means Fleets with Combat or Trade Focuses can regularly gain Adventure EXP as well.
You can also quickly gain Adventure EXP by obtaining Discoveries through Exploring during your sail, reporting your Discoveries to the Collector that you made a contract with, and lastly, completing Adventure Union Requests.
Adventure is at its most fun when making Discoveries. You can discover Cities and Villages by visiting foreign regions through sailing. To find other Discoveries, you must anchor your ship near the Land you wish to explore, disembark, and Explore. To discover marine life forms, you must fish in certain waters.
Items required for Fishing and Land Exploration, such as Fishing Rods, Paste, Rope, Hand Axes, Bedrolls, etc. can be purchased from Item Shops in cities.
Fishing
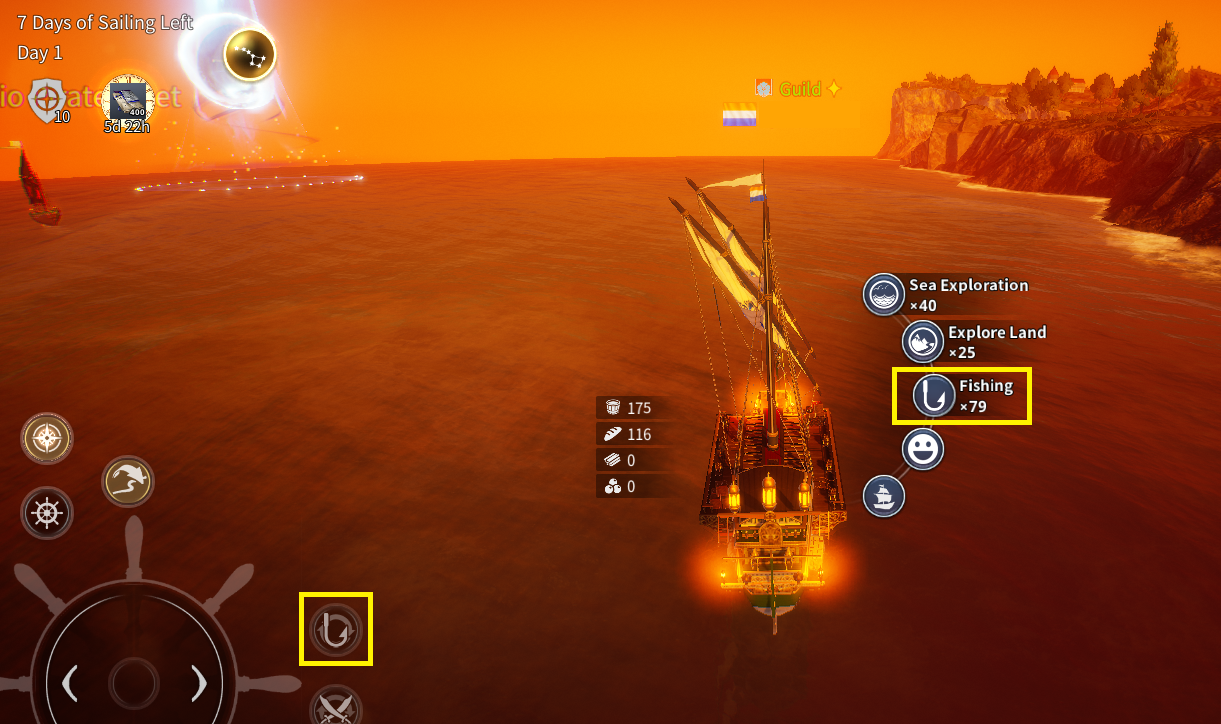
To enter Fishing Mode, you need to either select Fishing Mode after selecting a sailing ship or select Fishing Mode in the Observation Mode.
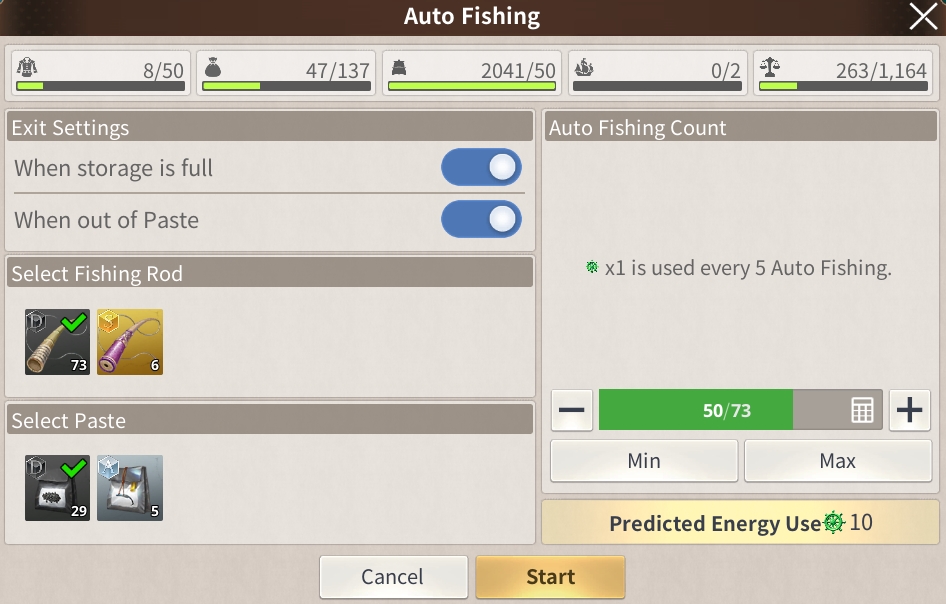
Also, by pressing the icon on the right, you can spend Energy to Auto Fish. 1 Energy is consumed for every 5 attempts, and the success rate varies depending on the fishing skills possessed by the fleet, such as mate effects. Auto Fishing will temporarily stop upon closing the game and will resume once you log back into the game.
After entering Fishing Mode, you can choose a Fishing Rod and Paste to use. Fishing Rods and Paste are considered as Usable.
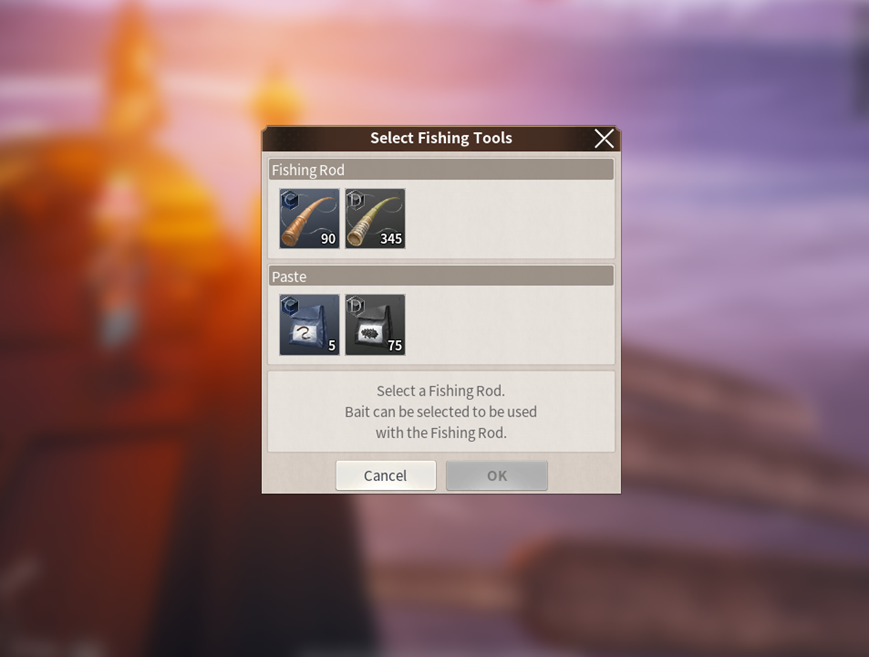
1. When you click the Fishing Rod button, you will cast the Fishing Rod. A fish will appear in the mini game screen as you wait. You can then click the Paste button to use paste.
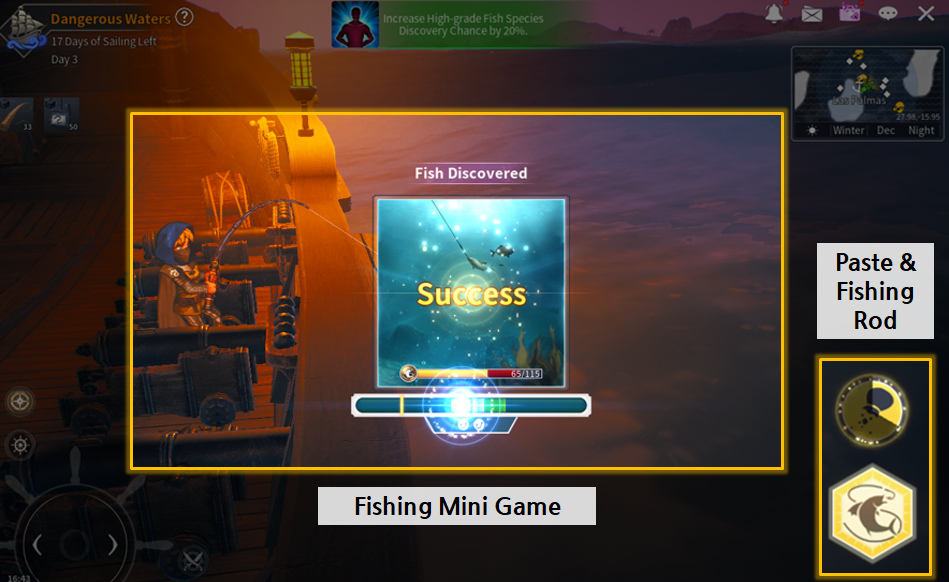
2. If you press the Fishing Rod button in accordance with the fish's movement, you can hook the fish, and if successful, the mini game starts.
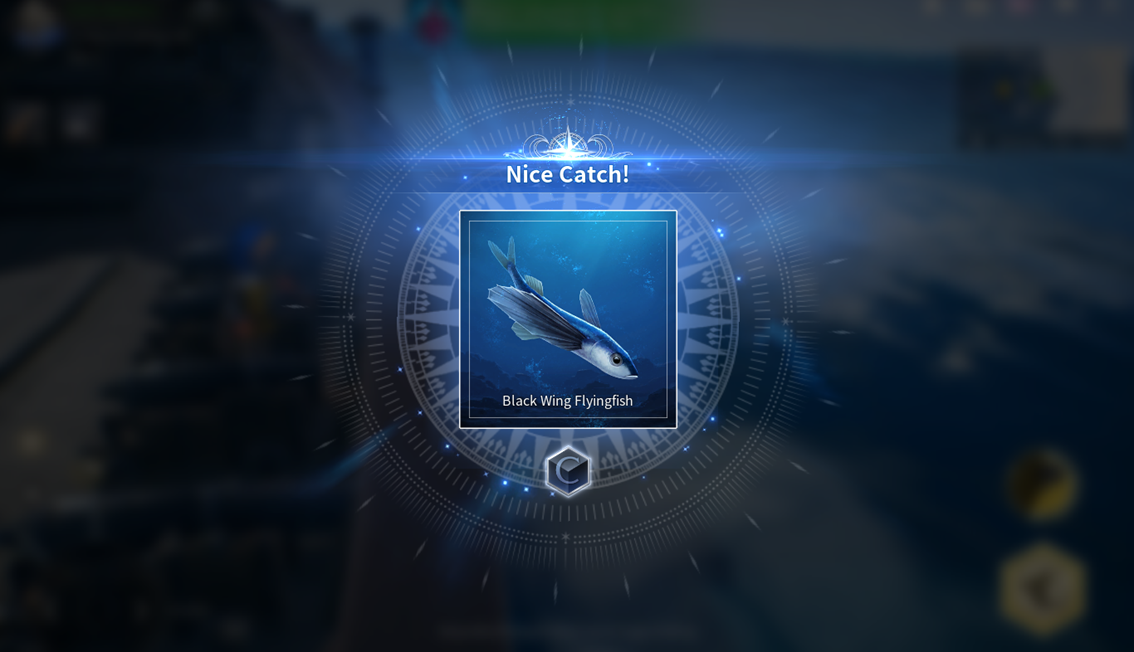
3. The mini game is a timed action game where you must aim for the green bar at the right time. Once the fish's HP is depleted, you will get a successful catch.
Superior Fishing Rods make it easier to catch stronger, rarer fish. Using Paste while fishing increases the chances of discovering high-grade fish. The chance of finding a rare fish goes up from 10% to 100% depending on the type of Paste used, with the use of a single Paste lasting for one and a half minutes.
■ Fishing Items Sold at the Item Shop


You can fish when you are anchored, or while sailing. You can play this as a sort of mini game when you are sailing far distances.
When you are sailing, you might run into Fishing Points, where you have more chances of finding certain types of fish. For maritime events, you may run into Seagulls or a Shoal of Flying Fish, which increases the chances of successful fishing or increases your Fishing skill.
Exploration
There are two types of Explorations.
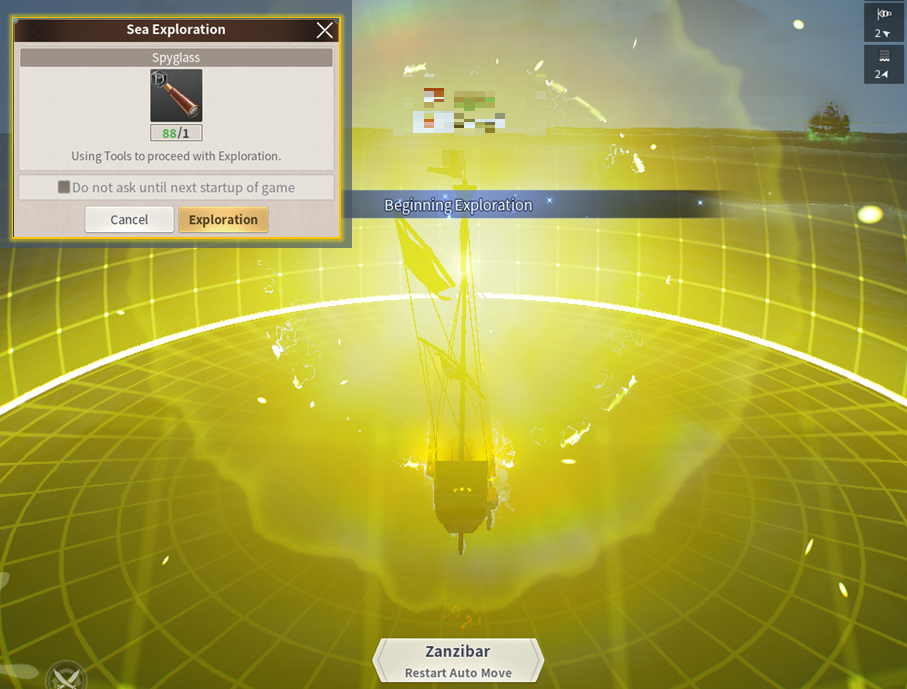
First of all, you can use a Spyglass to conduct a Sea Exploration, which means you will search the area surrounding your ship to find maritime Discoveries.
You will be notified once a new Discovery is found.
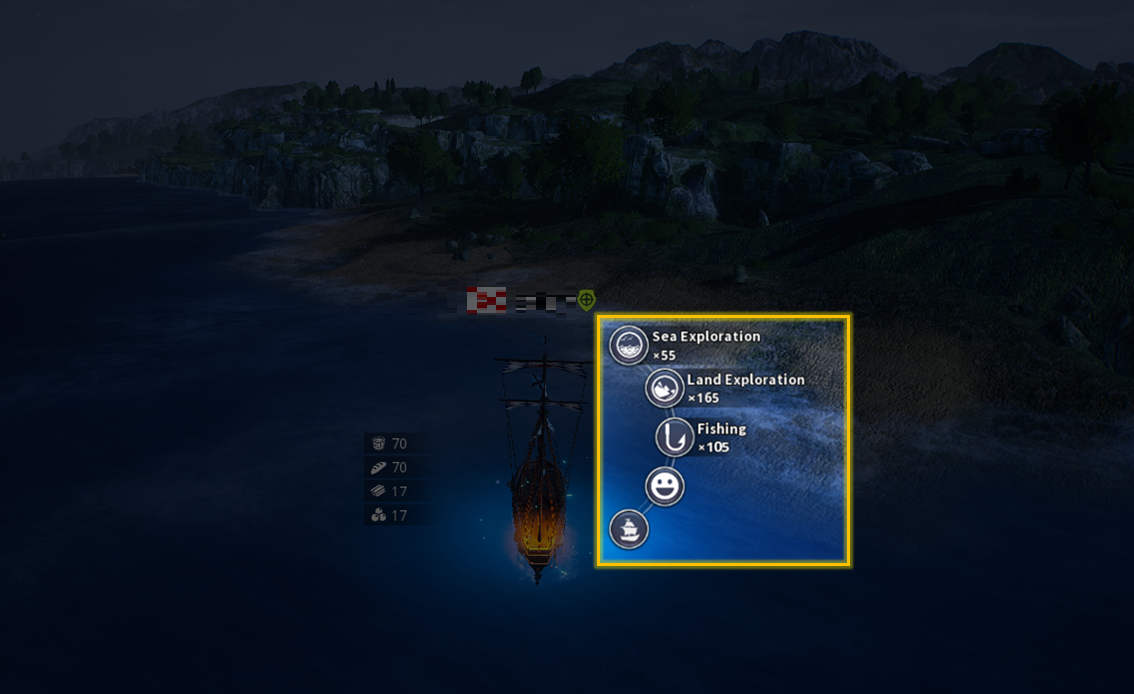
Next is Land Exploration, the most basic type of exploration.
If you wish to explore a land, you must anchor near the land and enter Observation Mode to initiate Land Exploration.
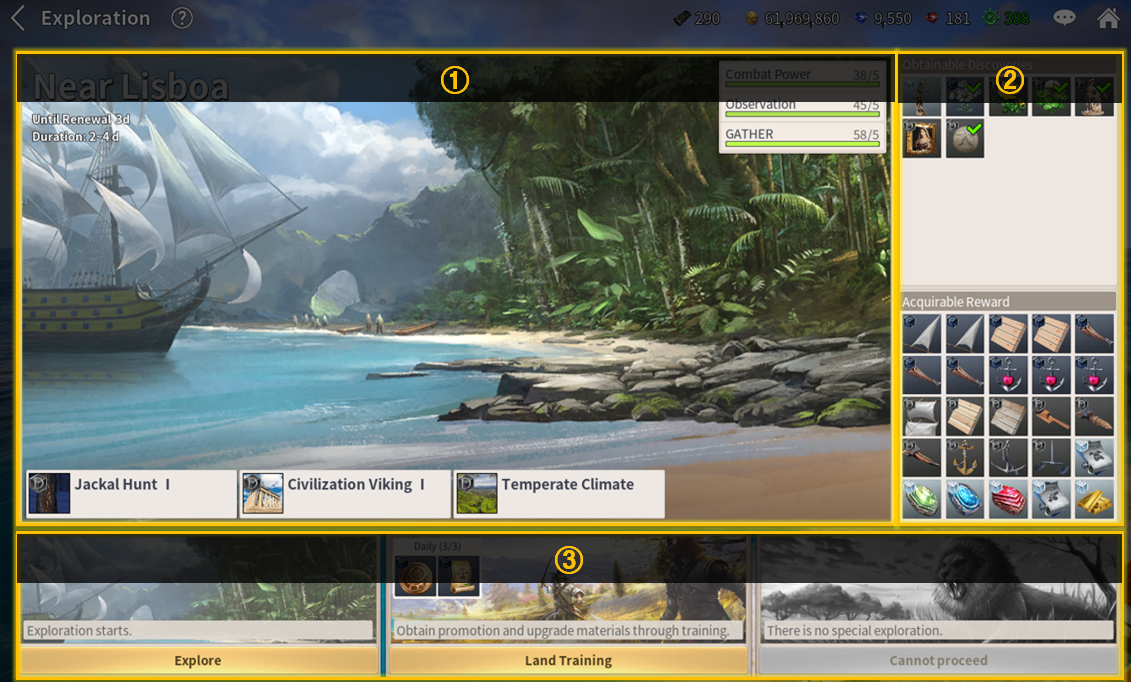
① Regional Trait: Here, you can view the land's minimum days of exploration, regional traits, and required abilities for a successful exploration. Discoveries and rewards may differ depending on the Regional Trait.
② Discoveries: Here, you can see the Discoveries and Acquirable Rewards you might be able to gain through exploration. Once Discoveries are made, you can report them to a Collector or brag about them to an Inn Employee.
③ Exploration Mode: Depending on your purpose, you can Explore, conduct a Land Training, or launch a Special Exploration.
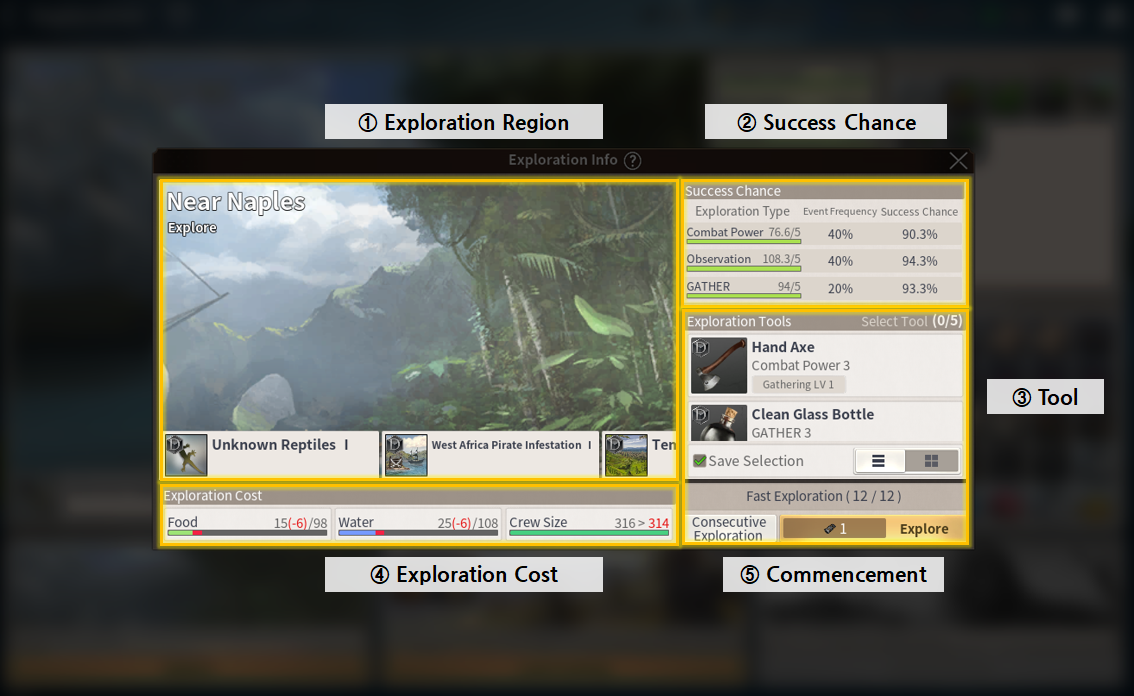
① Exploration Region: You can view the exploration region and its traits.
② Expected Results: You can check the chances of events occurring and expected results.
③ Exploration Tools: You can choose your Exploration Tools here. Exploration Tools that have been previously used can be saved via Save Selection.
④ Exploration Cost: You can view the projected Supply cost and damage to Crew.
⑤ Commence Exploration: You can begin your Exploration by using the required tool (Bedroll). You can choose the number of Consecutive Explorations that you wish to conduct.
When you commence an Exploration, Land Exploration will begin automatically, and depending on the selected Exploration mode, Combat, Observation, and Land Training occurs, and you can view a brief summary of events. After the selected days have passed, the Exploration will end, allowing you to see the results.
Besides Land Explorations, you can find Sunken Shipwrecks or uncharted remote villages to explore. Exploring a village consumes Energy. You can gain various Supplies, and on rare occasions mysterious items.
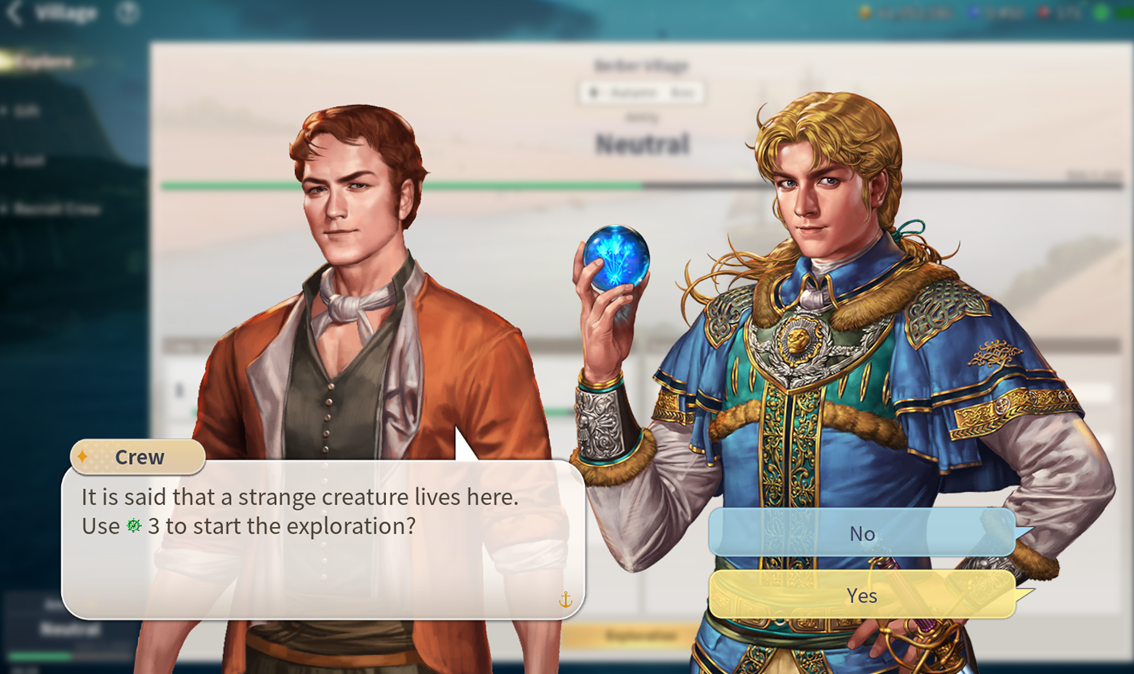
Unlike normal cities, villages are small and do not have infrastructures for ship maintenance, but you can recruit crew.
You can either choose to spend Ducats to give Gifts and raise Amity with villagers, or loot them to quickly gain supplies. Looting a village costs you great deal of Amity. If your Amity drops to a certain level, you can no longer anchor in the village.
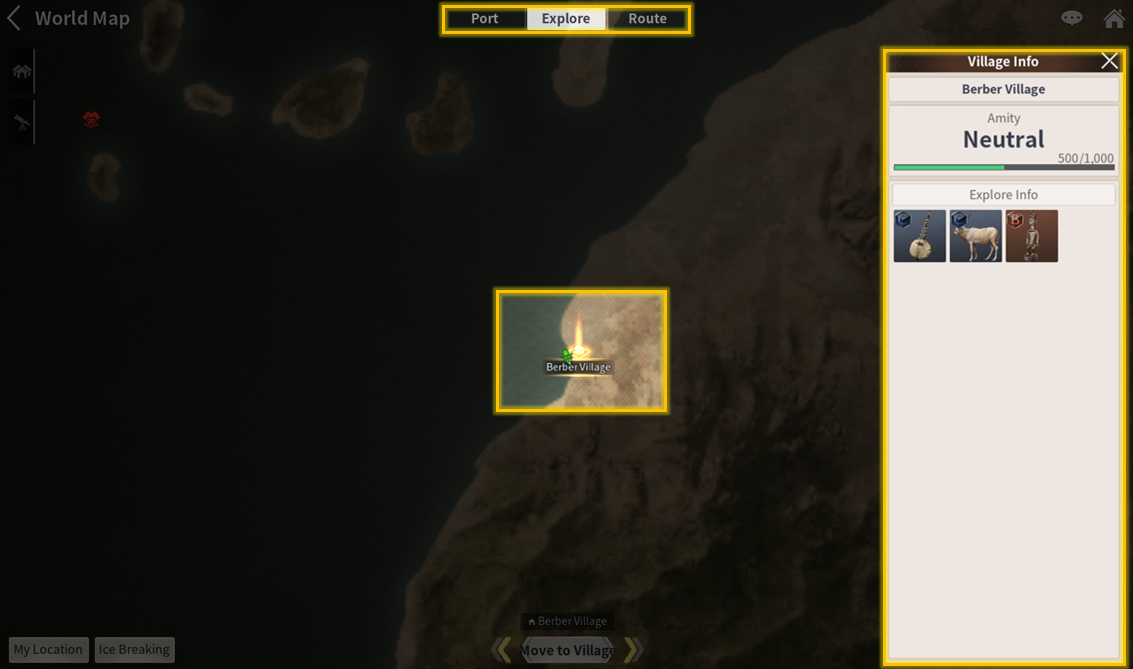
You can check already discovered Exploration Spots at [World Map] - [Explore].
■ Exploration Items Sold at the Item Shop


Trade
Trade is why many Companies of different nations sail the world of Uncharted Waters.
Trading goods between cities or nations is one of the surest economic activities that a player can perform as they amass a massive Company and pioneer new sailing routes. Through a successful Trade, you can earn a significant amount of Ducats, along with Trade Fame and Trade EXP.
A profitable Trade will grant you Trade EXP. Greater profits significantly increase the amount of EXP gained. You can gain additional EXP by dealing Specialties.
Completing Trade Union Requests is one way to effectively increase your Trade LV. If your Company Focus is set to Trade, you can obtain Wood for building ships as a reward for completing Daily Tasks.
The most basic element of Trade is to buy low, and sell high. To be able to do this, you need to be able to read the Market Price of Trade Goods, and discover more routes to safely transport them to your destination.
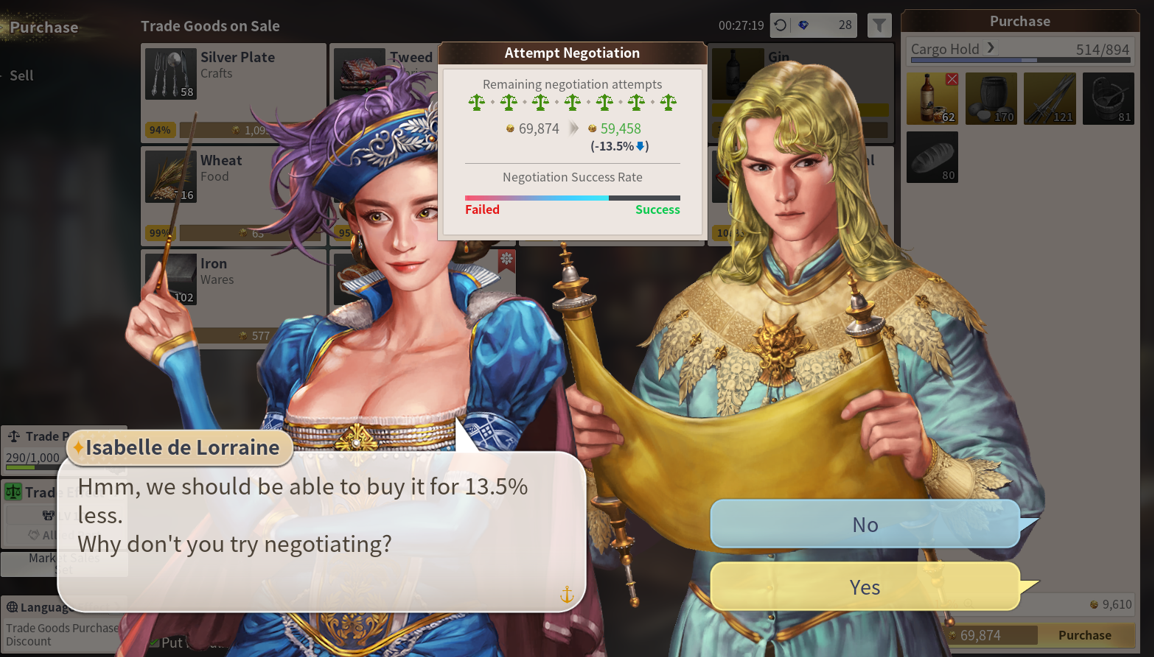
Markets exist in all cities. In order to trade, you must have a Language LV for the region. A higher Language LV means Discounts when you buy, and a Surcharge Effect when you sell. Also, depending on your Mates' abilities and Expertise, such as Purchasing, Sales, and Negotiation, you might be able to negotiate with the Market Owner through the Negotiation Skill.
Trade-specialized ships can carry more Trade Goods. You can also modify your Cabins to increase the Load Capacity.
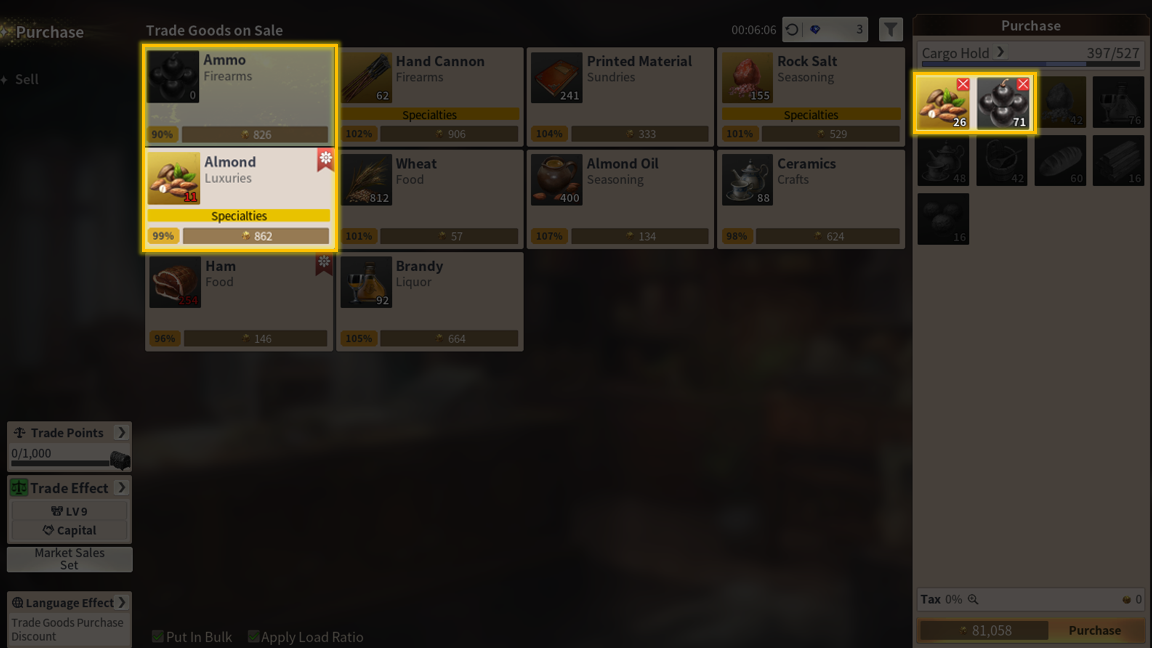
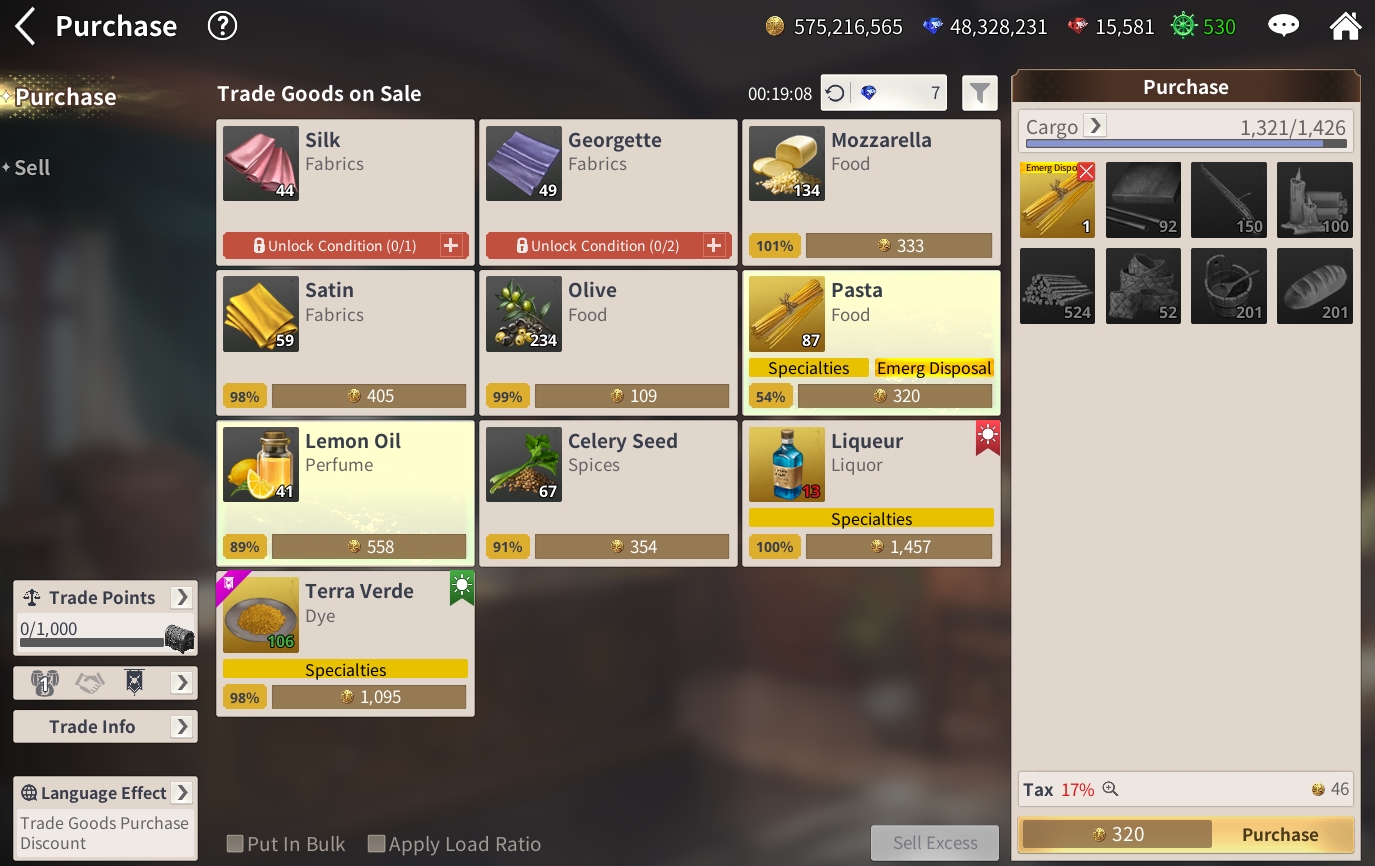
Trade Goods Market Price
Reading the Market Price is imperative when choosing Trade Goods to deliver through a long journey.
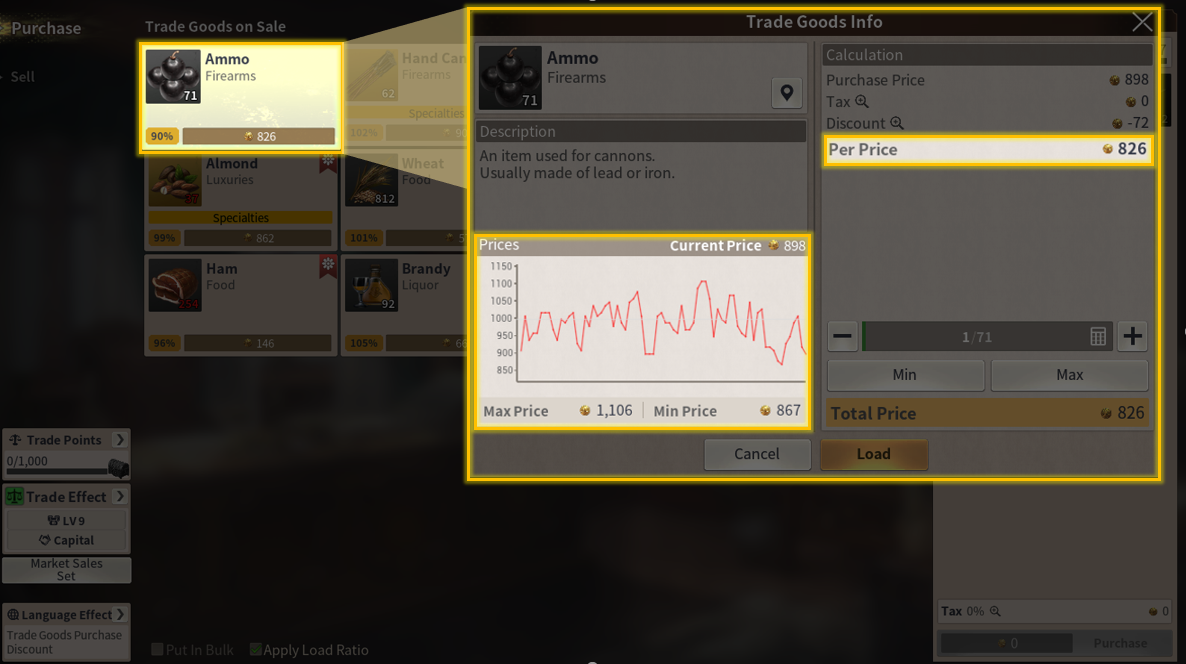
The market price is marked with % beside the price of Trade Goods. If the market price is lower than 100%, it means the product is sold at a cheaper price than nearby cities. However, if the market price is higher than 100%, it means it is more expensive than that of nearby cities. Buying at a price lower than Market Price and selling at a price higher than Market Price is the core of Trading.
You can read the Price Graph to see the price trend of the last 7 days. It's good to buy if the price is close to the Min Price, and sell if the price is close to the Max Price.
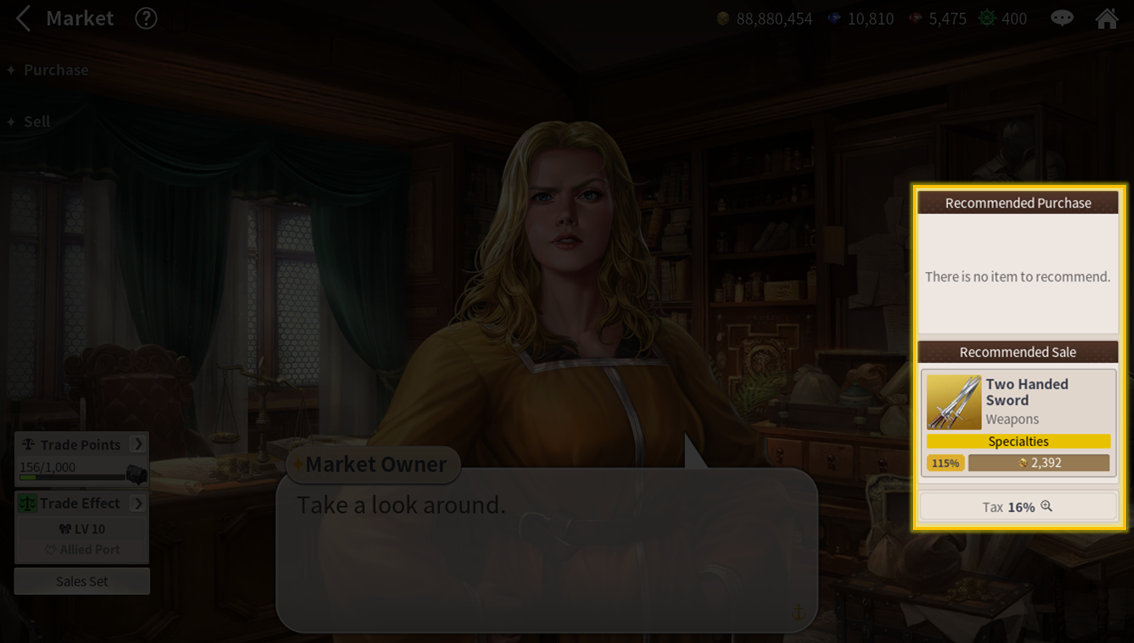
Items with less than 90% market price are in the Recommended Purchase List, and items with greater than 110% market price are in the Recommended Sell List.
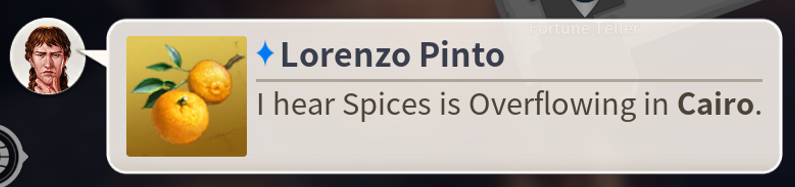
Sometimes Trade Events like Soaring, Plunging, Trending, Overflowing, Booming happen and drastically change the price of certain Trade Goods. If you take advantages of these events, you can make great profits by buying Trade Goods at incredibly low prices or selling them at very high prices.
A Price Event that you must not miss! What is a Major Trend?
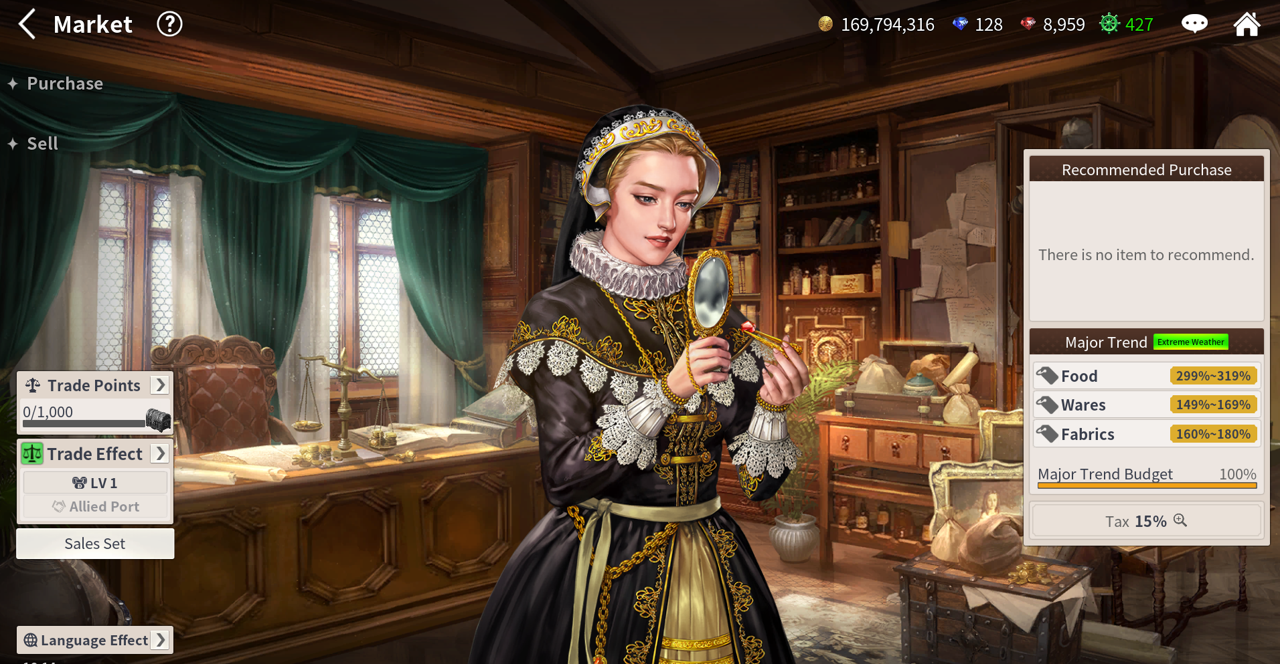
The Major Trend is an event you can earn a large profit from, depending on how you choose to take advantage of it.
The Major Trend occurs on a Trade Area basis depending on its occurrence cycle and occurrence rules. An ongoing Major Trend can be seen in the World Map.

Unlike other price events, the Major Trend has its unique parameter - Budget. You can spend the Major Trend Budget until it reaches 0% or until 1 hour passes since the beginning of the Major Trend event.
The Major Trend Budget is shared across all players in the server. It is determined by a number of concurrent players, a city where the Major Trend occurs, and the Major Trend's type.
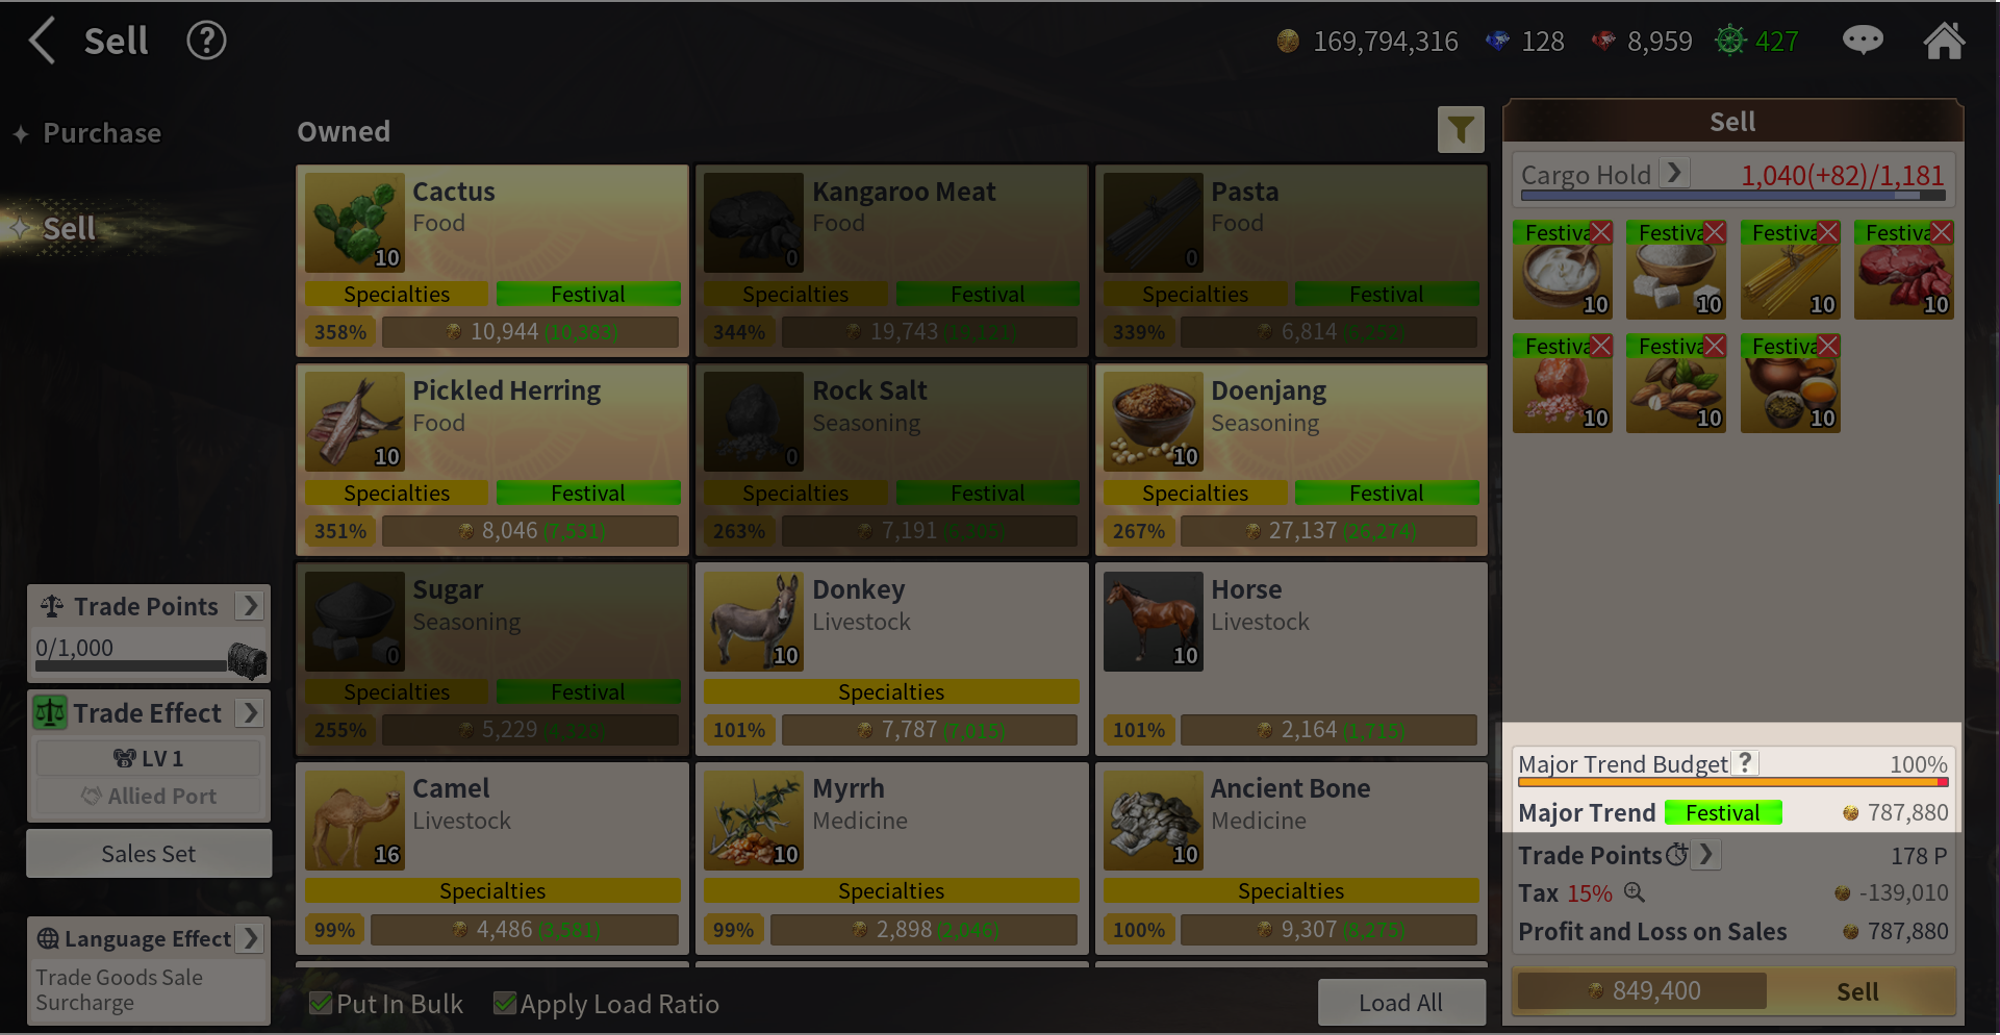
When you sell Trade Goods to the city where the Major Trend occurred, your Budget will go down as much as the profit you make.
The price will stay within 100% to 125% range when the Major Trend is over to ensure that players at least get what they paid for, even if the Budget reaches 0 or the 1 hour time limit passes.
Trade Goods with low Trade margin especially benefit from the Major Trend, in terms of Prices.
- Example 1 : During the Major Trend, Foods' price range will be determined within 299% to 319%.
- Example 2 : During the Major Trend, Metals' price range will be determined within 151% to 171%.
You can check the detailed price information in the game.
Specialties' price increases higher than basic Trade Goods' price. Also, note that Specialties with low Trade margin benefit more from the Major Trend.
- Example : The price of Medicines is determined within 216% to 236%, yet the price of Ginseng, which is a specialty, is determined within 242% to 262%.
- The increased price decreases to a random price within 100% to 125% range when the Major Trend is over.
There are total eight types of Major Trends, and each of them occurs in a different cycle.
Also, note that certain Trade Goods will change their prices, depending on the type of Major Trend that occurs.
- Festival : Foods, Seasonings, and Luxuries
- Plague : Sundries, Medicines, and Textiles
- Flood : Foods, Wares, and Fabrics
- War : Livestock, Weapons, and Firearms
- Sponsor: Dyes, Crafts, and Artworks
- Development : Wares, Ores, and Liquors (or Foods)
- Boom : Metals, Artworks, and Jewelries
- Extravagance : Crafts, Spices, and Perfumes
Trade Point and Sales Set
Trade Points
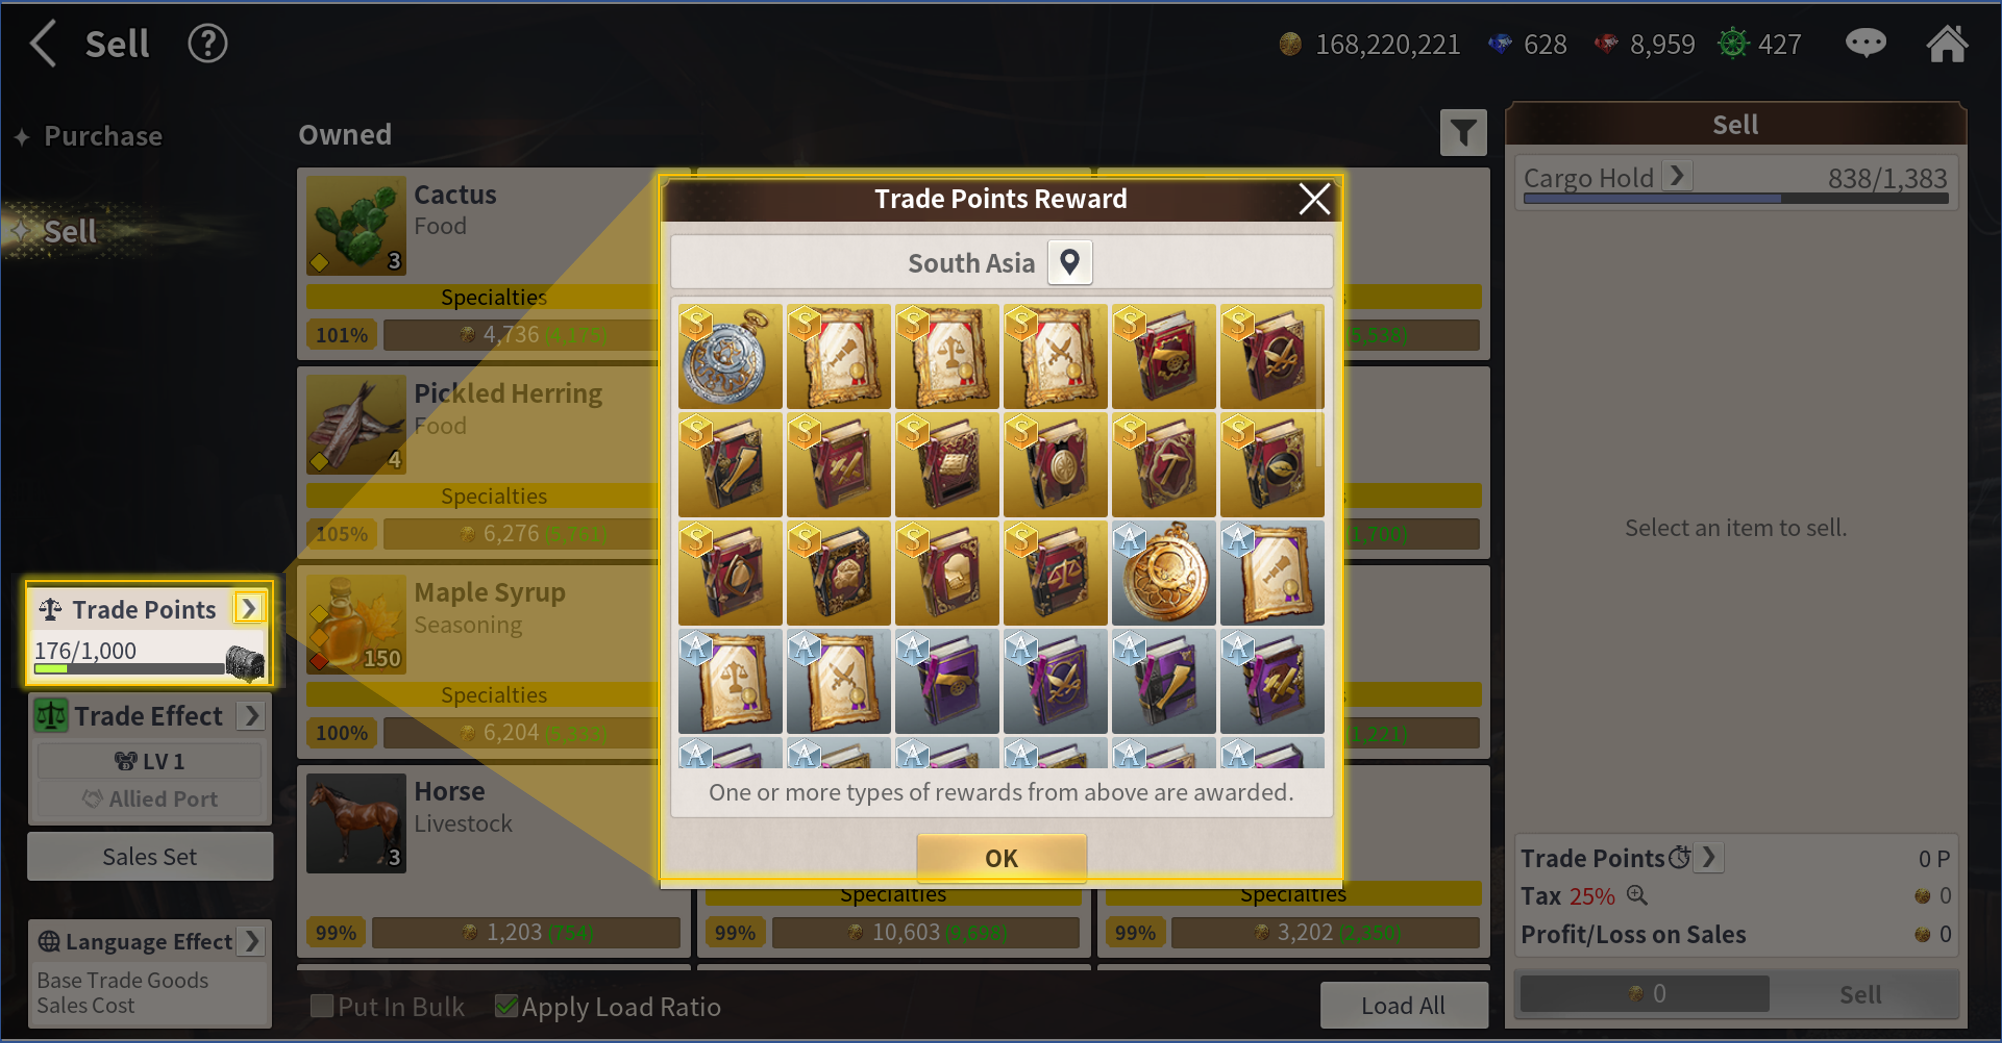
Each Trade Area accumulates your Trade Points whenever you make profits above a certain amount.
You can gain a random reward from a series of fixed rewards whenever your Trade Points reach 1,000. The list of available rewards can be viewed at the Trade Point menu.
The list of reward is determined by the current Company LV.
Sales Set
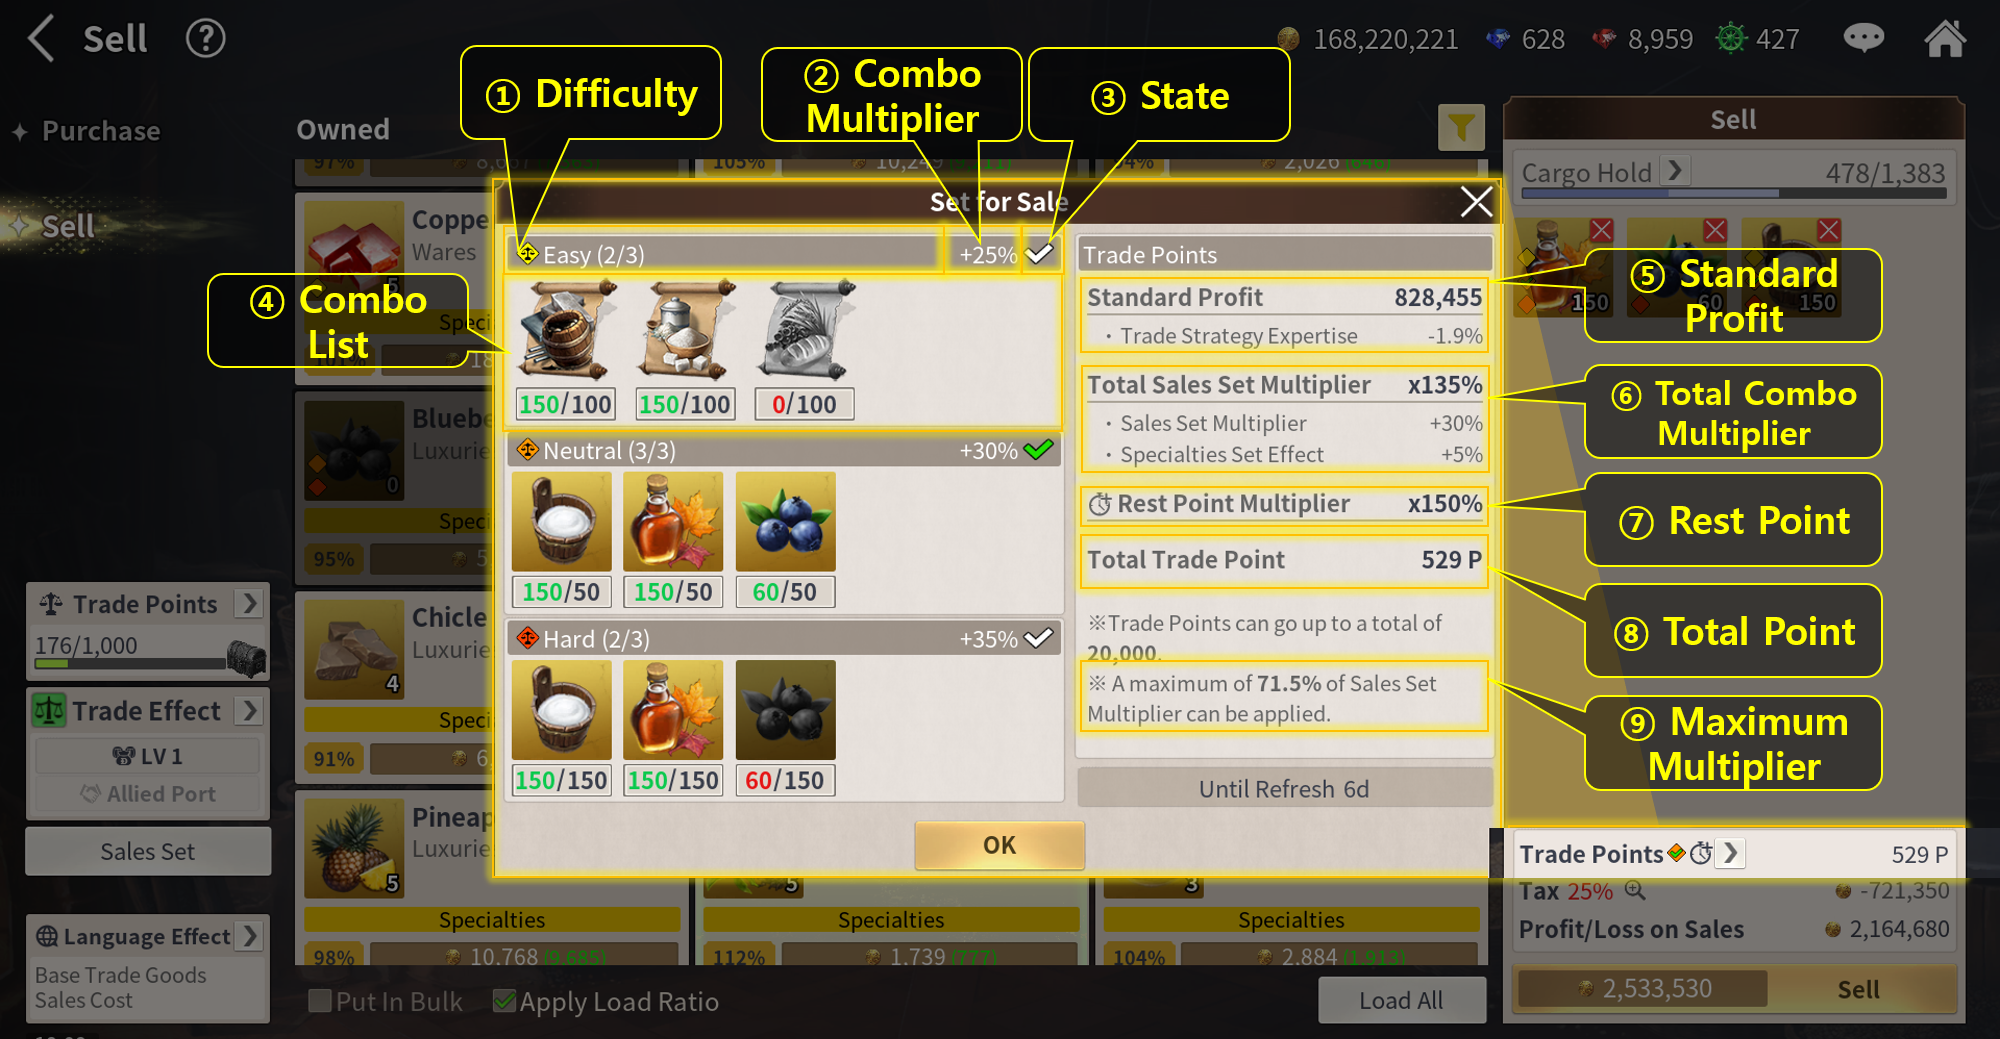
Sales Set is one method to acquire more Trade Points. You can activate Sales Set by selling a combination of certain Trade Goods to the Market. Note that each Market has different Sales Sets. The list of Sales Sets changes every week per Market.
To check the Sales Set for the Market you are visiting, you can either press the Sales Set button on the left, or press the Trade Point Pop-up in the Sell page.
The Sales Set button's list is sorted by currently owned Trade Goods in the Cargo Hold, and the Trade Point Pop-up's list is sorted by the Trade Goods that are currently being sold.
① Difficulty: The difficulty of the Sales Set.
② Sales Set Multiplier: The Sales Set multiplier that you can receive upon achieving the Sales Set.
③ Sales Set Achieved: It will be displayed in green if the Sales Set is achieved.
④ Sales Set List: The list of Trade Goods and the amount that consist of a Sales Set. You must meet all requirements.
⑤ Standard Profit: The minimum required profit to gain Trade Points. It differs depending on the Company LV and is reduced if your Trade Expertise LV is high.
⑥ Total Multiplier: The sum of all achieved multipliers. An additional multiplier is added when you can achieve the Sales Set with only Specialties.
⑦ Rest Point: Rest Points are added as additional multipliers whenever you achieve daily profits below a certain amount in the Trade Area of the current Market you are trading at. If you make a certain amount of profit or more, the multiplier does not apply. The multiplier is applied after midnight of the next day.
⑧ Total Point: The total Trade Points you can acquire.
⑨ Maximum Multiplier: The maximum limit of the sum of applied multipliers. It increases as your Trade Strategy Expertise LV increases.
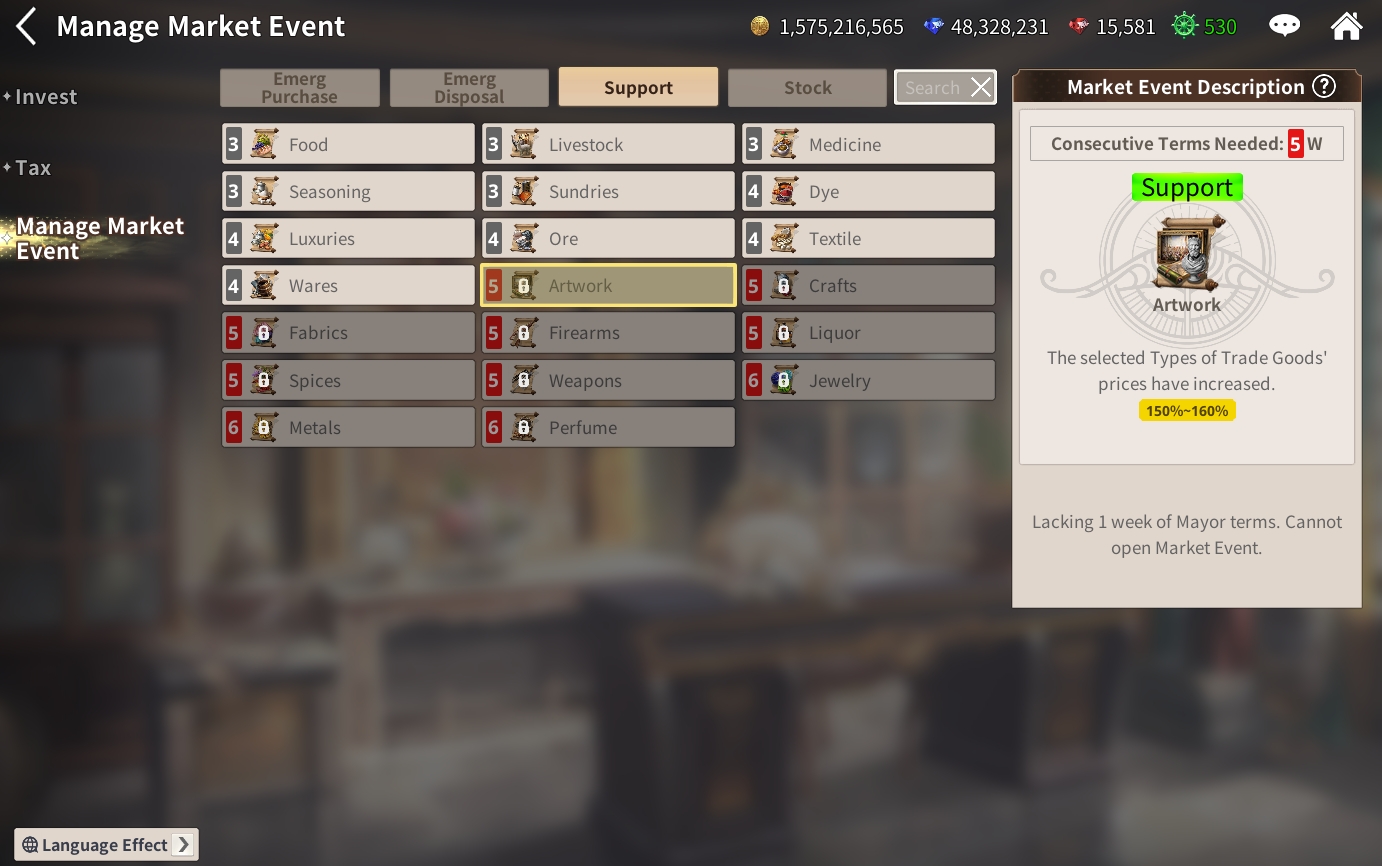
Trade Events by the Mayor! Market Events
Market Events are trade events that can be held by a city’s mayor. There are 4 types of Market Events, which are listed below.
Short information about ongoing Market Events can be seen on the World Map by clicking on cities.
- Urg. Buy: Selected Trade Goods can be sold at a higher price.
- Urg. Sale: Selected Trade Goods can be purchased at a lower price.
- Bazaar: A selected type of Trade Good can be sold at a higher price.
- Closeout: A selected type of Trade Good can be purchased at a lower price.
Mayors can manage Market Events to hold from [Manage Market Event] at Bureaus, and Market Events can be held once during the basic, one-week term of a mayor.
Market Events are held for an hour from the designated time and consume currency.
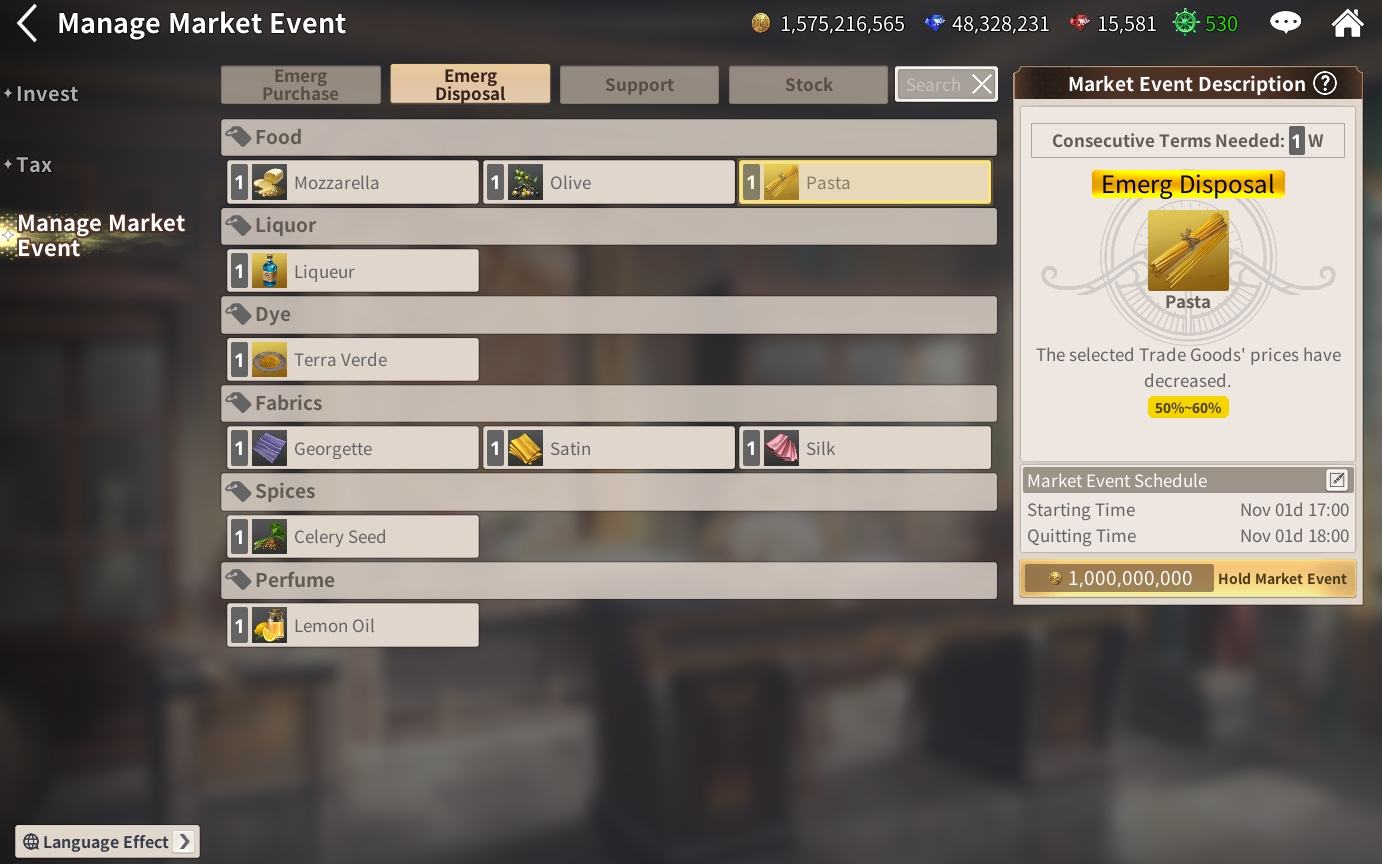
The types of Market Events that can be held and the types of Trade Goods that can be designated at Market Events increase the more consecutive terms a mayor serves.
Tax and Tax Permit
When the Beginner Benefits end, Taxes are applied to all trade activities you perform in Markets that do not belong to your nation.
Note that the tax applies both to buying and selling. This means you will suffer heavy losses due to the double-taxation when buying and selling in foreign nations.
You gain tax exemptions from a Tax Permit, National Reputation, Admiral's title, City Trait, and Expertise. However, the most reliable method is the Tax Permit issued by a nation.
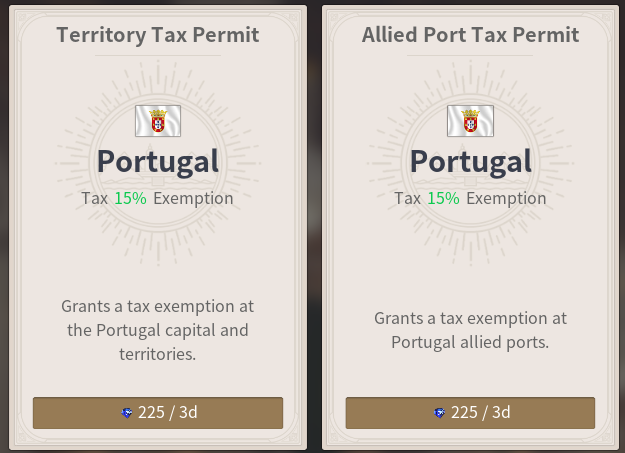
You can spend Blue Gems to buy a Tax Permit from each nation's [Capital] - [Palace], and note that the Tax Permit has an expiration date. If you have Tax Permits that benefit your main Trade Goods and sailing route, you can maximize your economic gains.
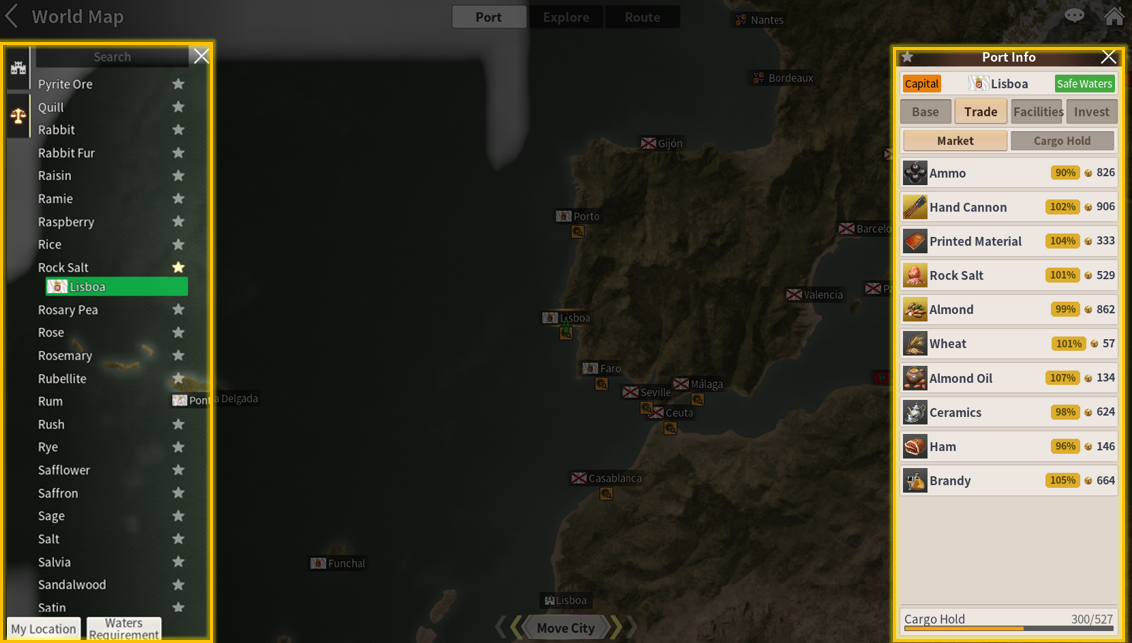
You can search certain cities or Trade Goods in the World Map and check available Trade Goods in advance.
If there are cities or Trade Goods that you often use, you can bookmark them for future use. Also, if you assign a Mate to your Accounting Room, you can check the Market Price of Trade Goods of nearby cities.
Combat
Combat refers to naval combats against other Fleets that occur when your Fleet sails for Adventure and Trade.
Some pirates may come after your Trade Goods, and Fleets from hostile nations might raid your Fleet. It is also possible to initiate combat from your side as well and target other Fleets. Combat can occur against NPCs and you can engage in combat against other players as well.
PvP combat against other players is possible only in Dangerous Waters, and if the opponent is online, it will be real-time PvP.
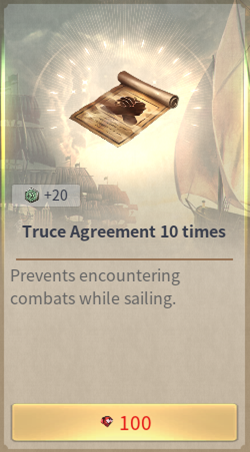
You can use the Naval Protection feature to protect your Fleet from enemies' attacks. Naval Protection comes as a part of the Beginner Benefits. When the Beginner Benefits end, you can purchase a [Ceasefire Agreement] at [Shop] - [Product] Tab. You can occasionally gain a Ceasefire Agreement as an event reward.
You can enable and disable Naval Protection by clicking an icon at the upper right side of the screen. You can disable it while sailing, yet you must enter a city to enable it again.

Combat against other Fleets can net you Loot, which include Trade Goods, Gears, Ducats, and Materials. You can also gain Combat Fame, and Combat EXP. You can also effectively gain Combat EXP by completing Combat Union Requests.
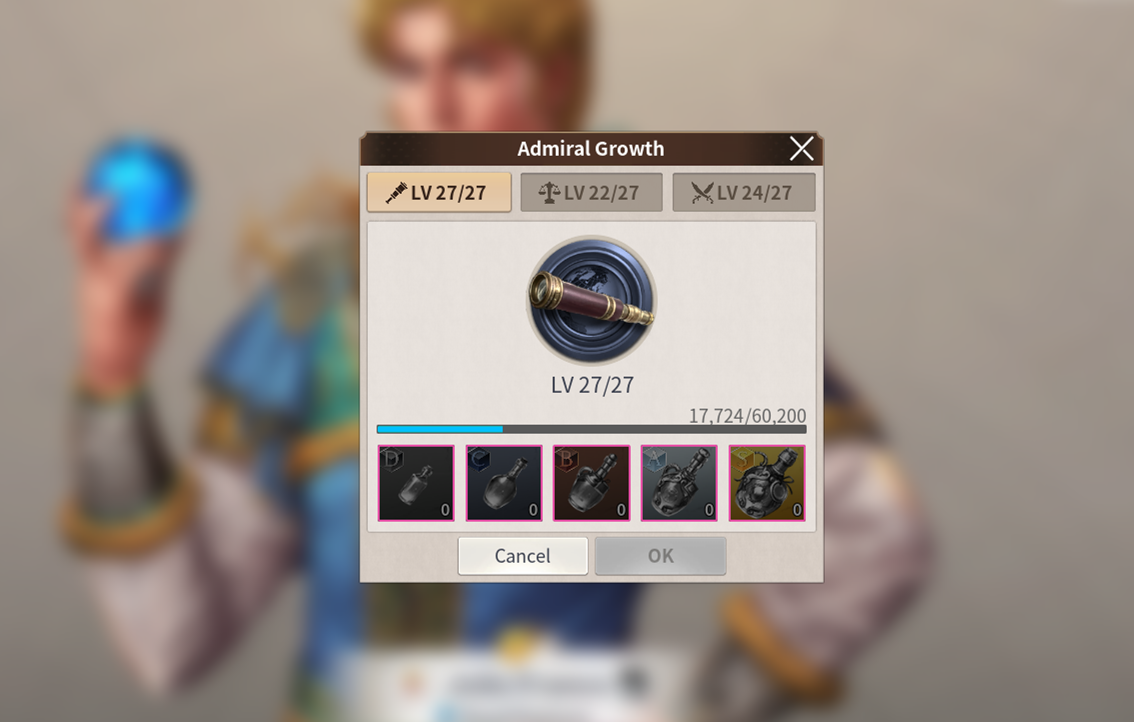
If your Company Focus is Combat, Combat Daily Tasks will be given to you. Completing them will give you Gun Ports.
Begin Combat
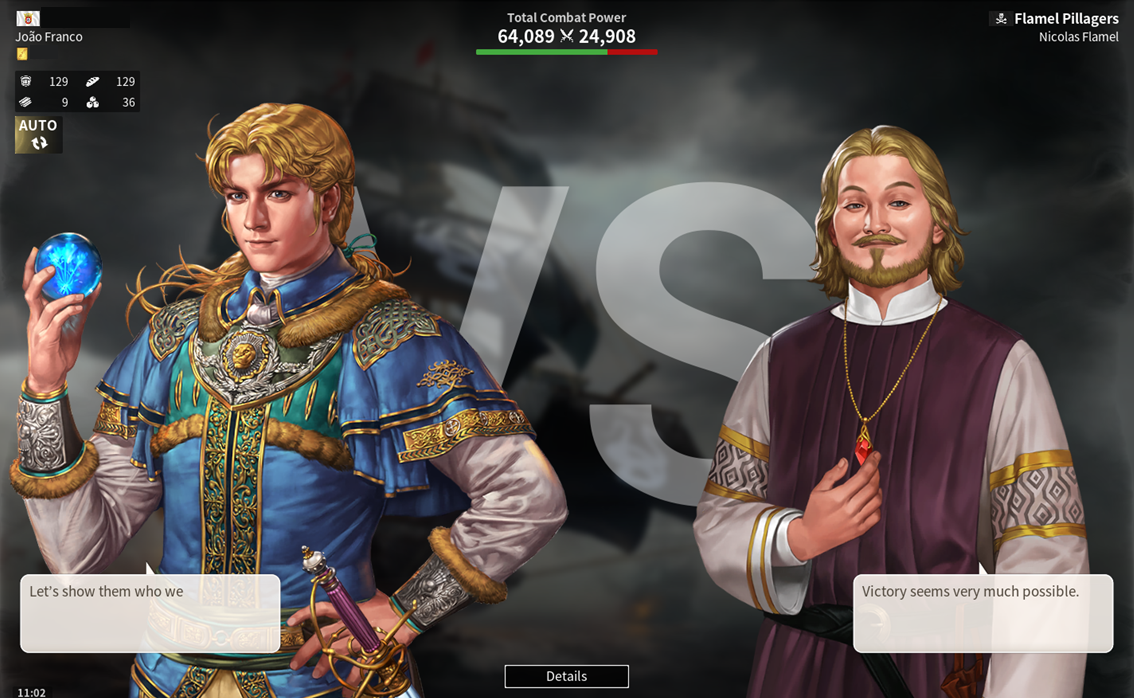
To begin combat, you must Declare Combat to an adjacent Fleet. Then, the opponent will choose among four options: Combat, Retreat, Surrender, and Parley. If the opponent chooses to attack or fails to parley, combat begins.
Combat happens in a separate map that consists of hexagonal tiles.
The Combat Zone has the trait of the waters where the Combat is happening. There are many variables that affect Ship management, such as terrain attributes and flotsam.
Combat is turn-based, and ships with higher Mobility go first every turn. You can check the Action Order of the current turn and the next's on the top of the screen.
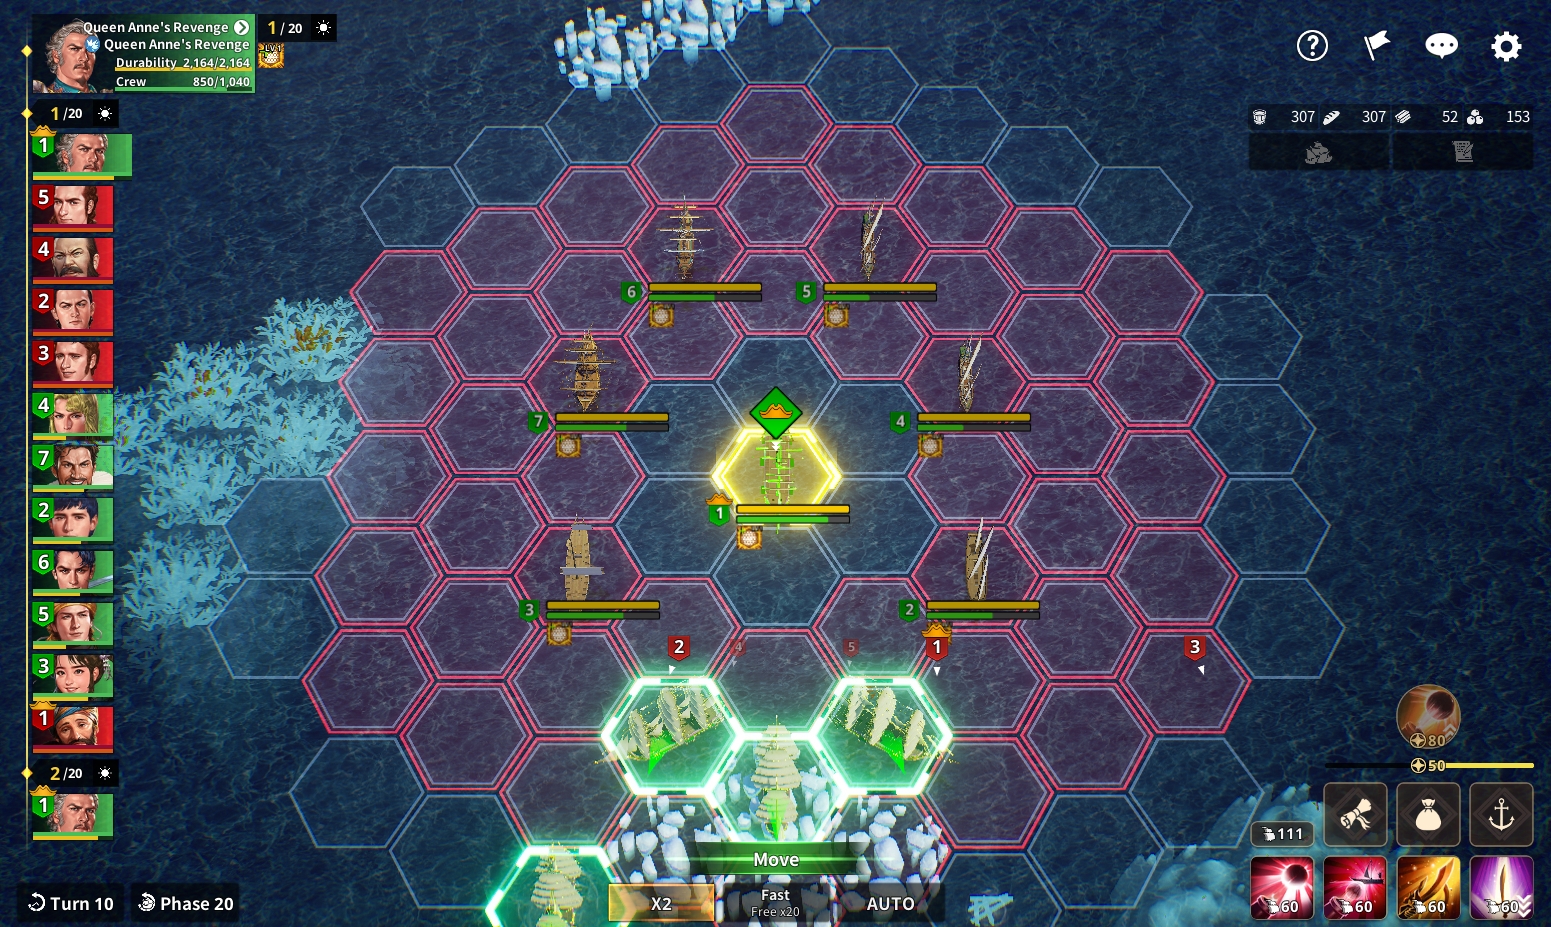
The basic rules of Combat are that all enemy Ships must be sunk to win and all ally Ships must be sunk to lose. However, Additional Goals exist per Combat, and additional Ducats can be received if the Additional Goals are achieved. Also, if the Additional Goals are completed multiple times, you can achieve "Monthly Task - Superb Strategist."
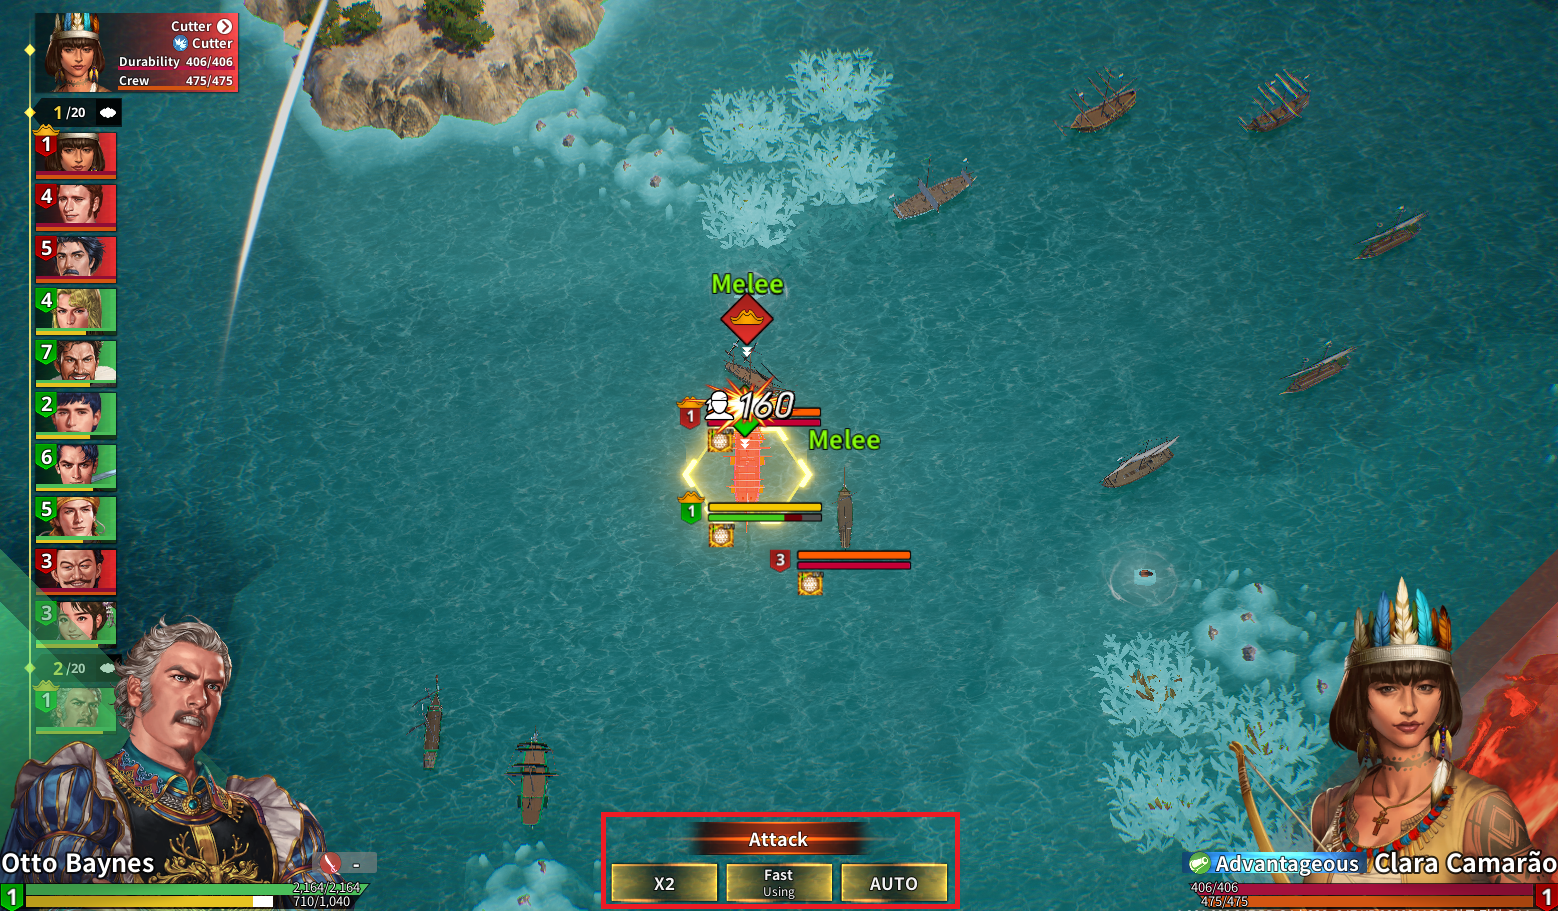
All ships can move when it's their turn. Players can choose to perform combat actions such as Artillery, Melee, Ram, and Duel. Players also can choose to perform Support Skills like Repair, Medicine, and Tool, or a Mate's Combat Skills.
A player can use the Admiral's Order during the Flagship's turn. Using an Admiral's Order does not spend a turn.
Other Combat Features
During combat, you can use combat features such as Manual Combat, Fast Combat, Auto Combat, and Repel Support .
Fast Combat, which simplifies combat animations to make the combat faster, is available in limited quantities. Beginner Benefits provide a certain number of free Fast Combats, and a player can purchase [Grace of Michael] at [Shop] - [Effects], which provides more or unlimited uses of Fast Combat.
Auto Combat is, as the name itself explains, an auto combat feature.
All ships fight automatically. While it is a useful feature, ships tend to only attack head-on during Auto Combat, so for difficult battles, some ships might sink under concentrated fire as they charge forward. In Game Settings, a player can choose to use Mate's Skills and the Admiral's Order during Auto Combat.
Combats still occur during offline-sailing. You can manage how your Fleet will react in combat in advance by accessing [Menu] - [Company Overview] - [Aide].
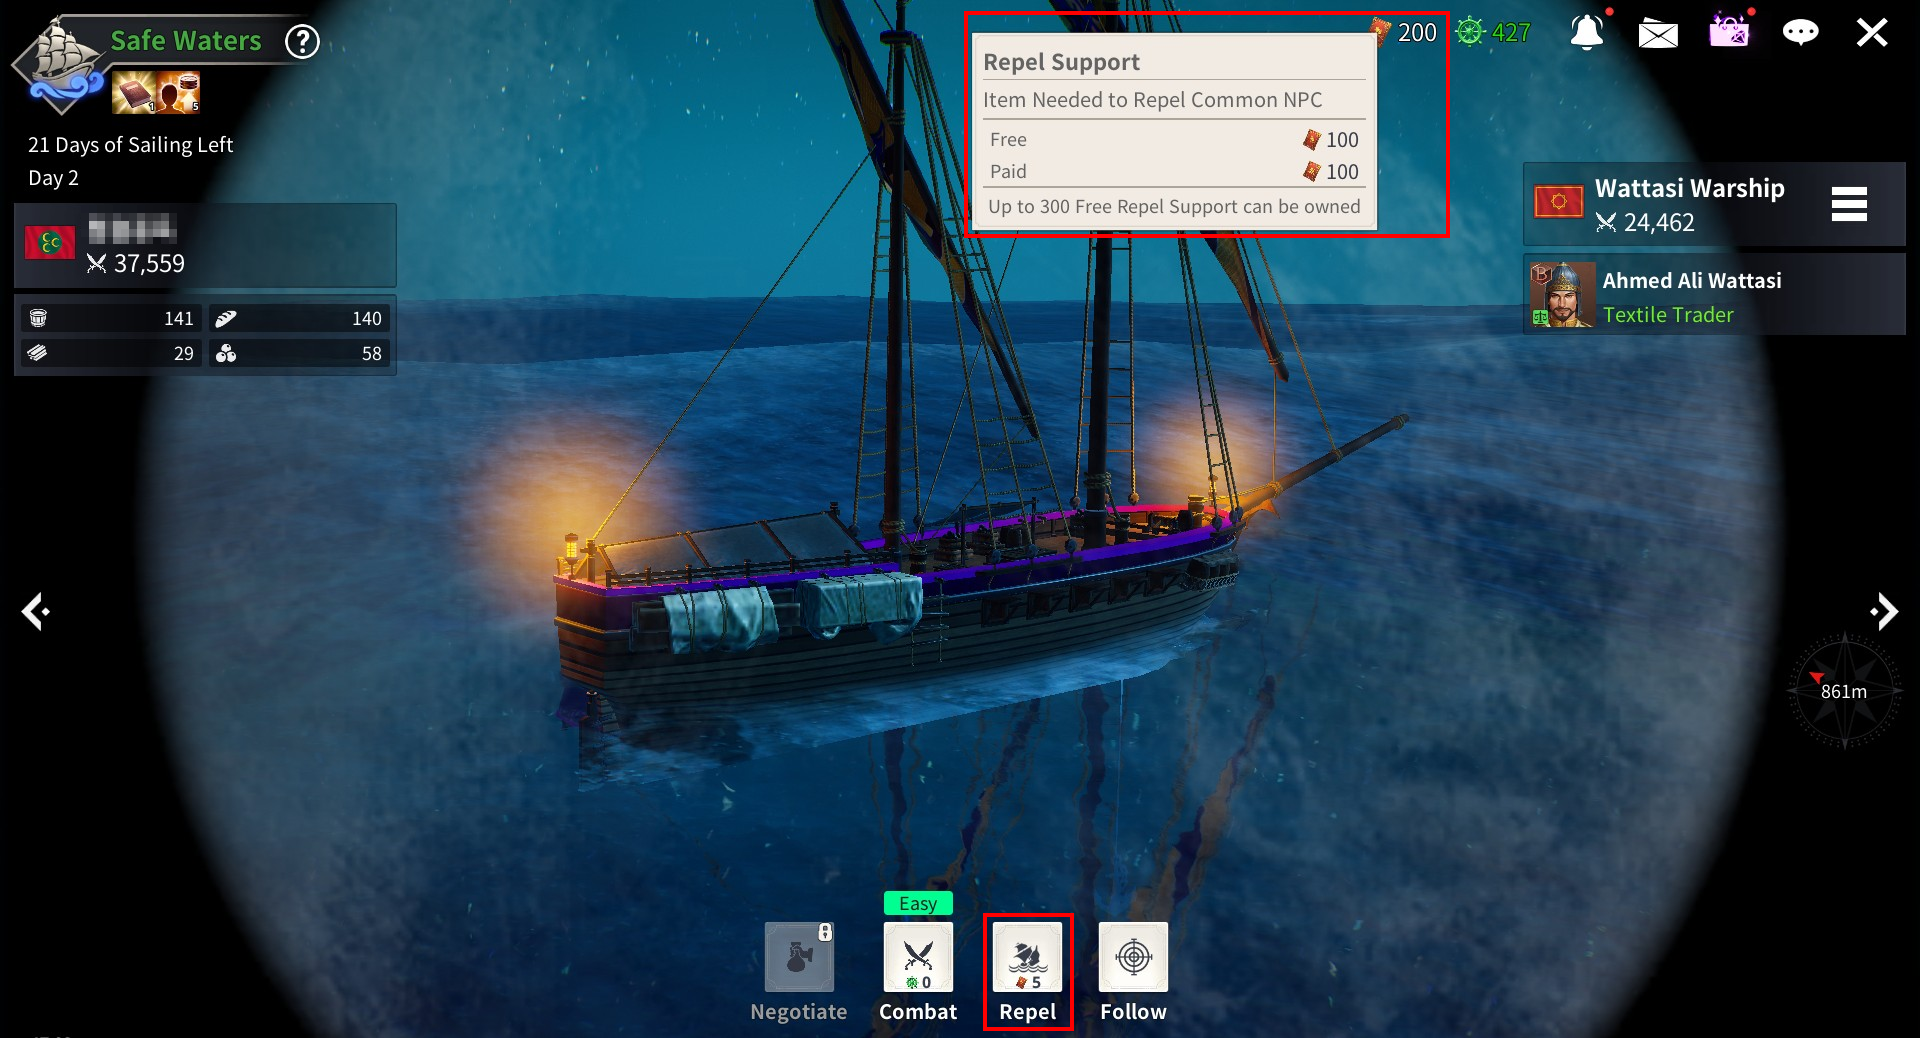
Combat can be won immediately without the combat process when Repel Supports are used.
The Repel button is displayed when selecting an enemy fleet in the Surveillance screen.
Win combat immediately by using Repel Support when your fleet’s Combat Power is equal to or higher than 1.3 times the enemy fleet’s by pressing the Repel button.
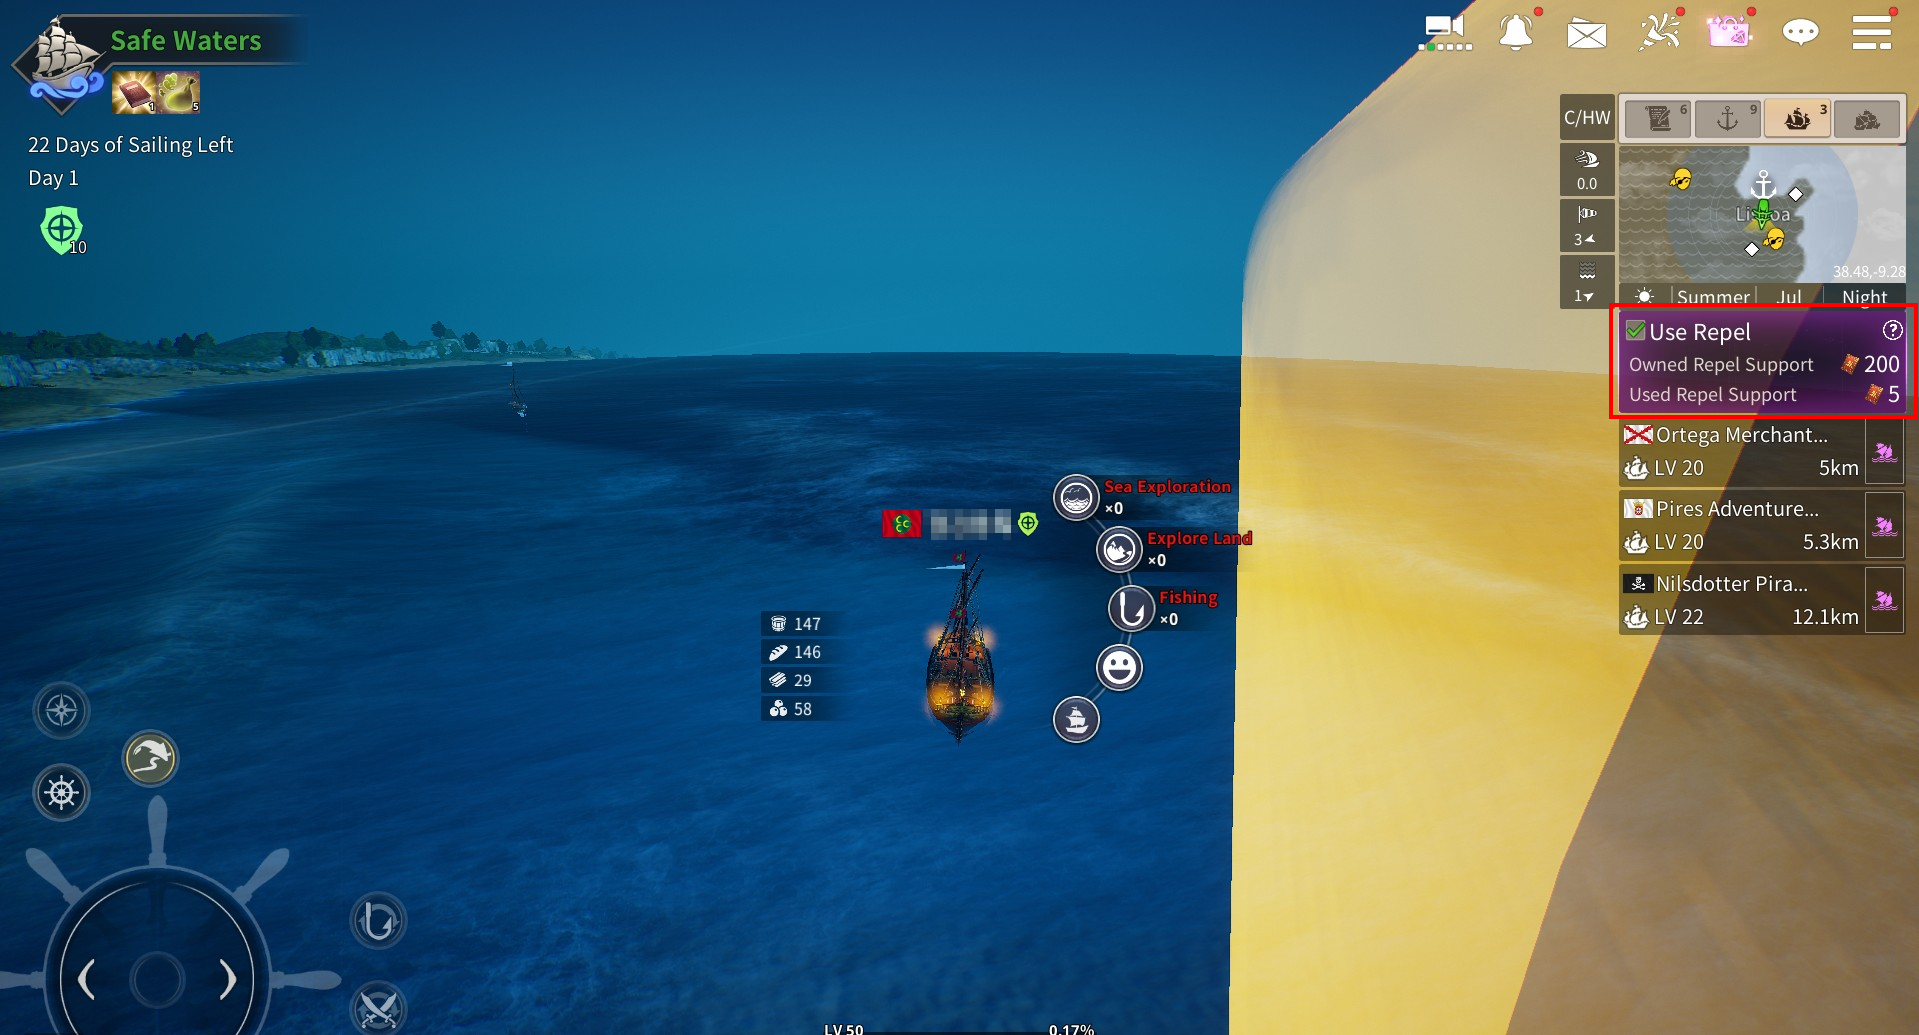
Repels also happen right away when the Use Repel checkbox is selected on the Fleet List screen and a ship is chosen after setting sail.
Different amounts of Repel Support are used depending on how much share your affiliated nation has in a Limited Area.
- When not occupying a Limited Area (Standard): Use 5 Repel Supports
- When occupying a Limited Area: Use 4 Repel Supports
- When monopolizing a Limited Area: Use 3 Repel Supports
- However, benefits related to occupying or monopolizing a Limited Area are not applied in Limited Areas with a nation’s capital. The standard amount of Repel Support is always used in those areas.
- Through Repel, the basic rewards from combat can be obtained except for supplies.
Repels can only be done against normal fleets and cannot be used against powerful opponents and event fleets and in quests.
Repel Supports can be obtained as a reward for completing all Daily Tasks and up to 300 free Repel Supports can be owned.
Paid Repel Supports can be purchased at the shop and there is no limit on the number of paid Repel Supports that can be owned.